
Patching a Hole in a Hardshell Rooftop Tent
“Shit Happens”. Forrest Gump reminds us of that.
And that’s a good summary of what happened to our rooftop tent. We recently ordered a new Area BFE Hardshell rooftop tent from our overland outfitting friends at the Spirit of 1876. In the process of shipping the tent to me. however, it was severely damaged by the freight company. Despite the damage, I highly recommend Mike and the crew at the Spirit of 1876, and would absolutely buy another tent from them.
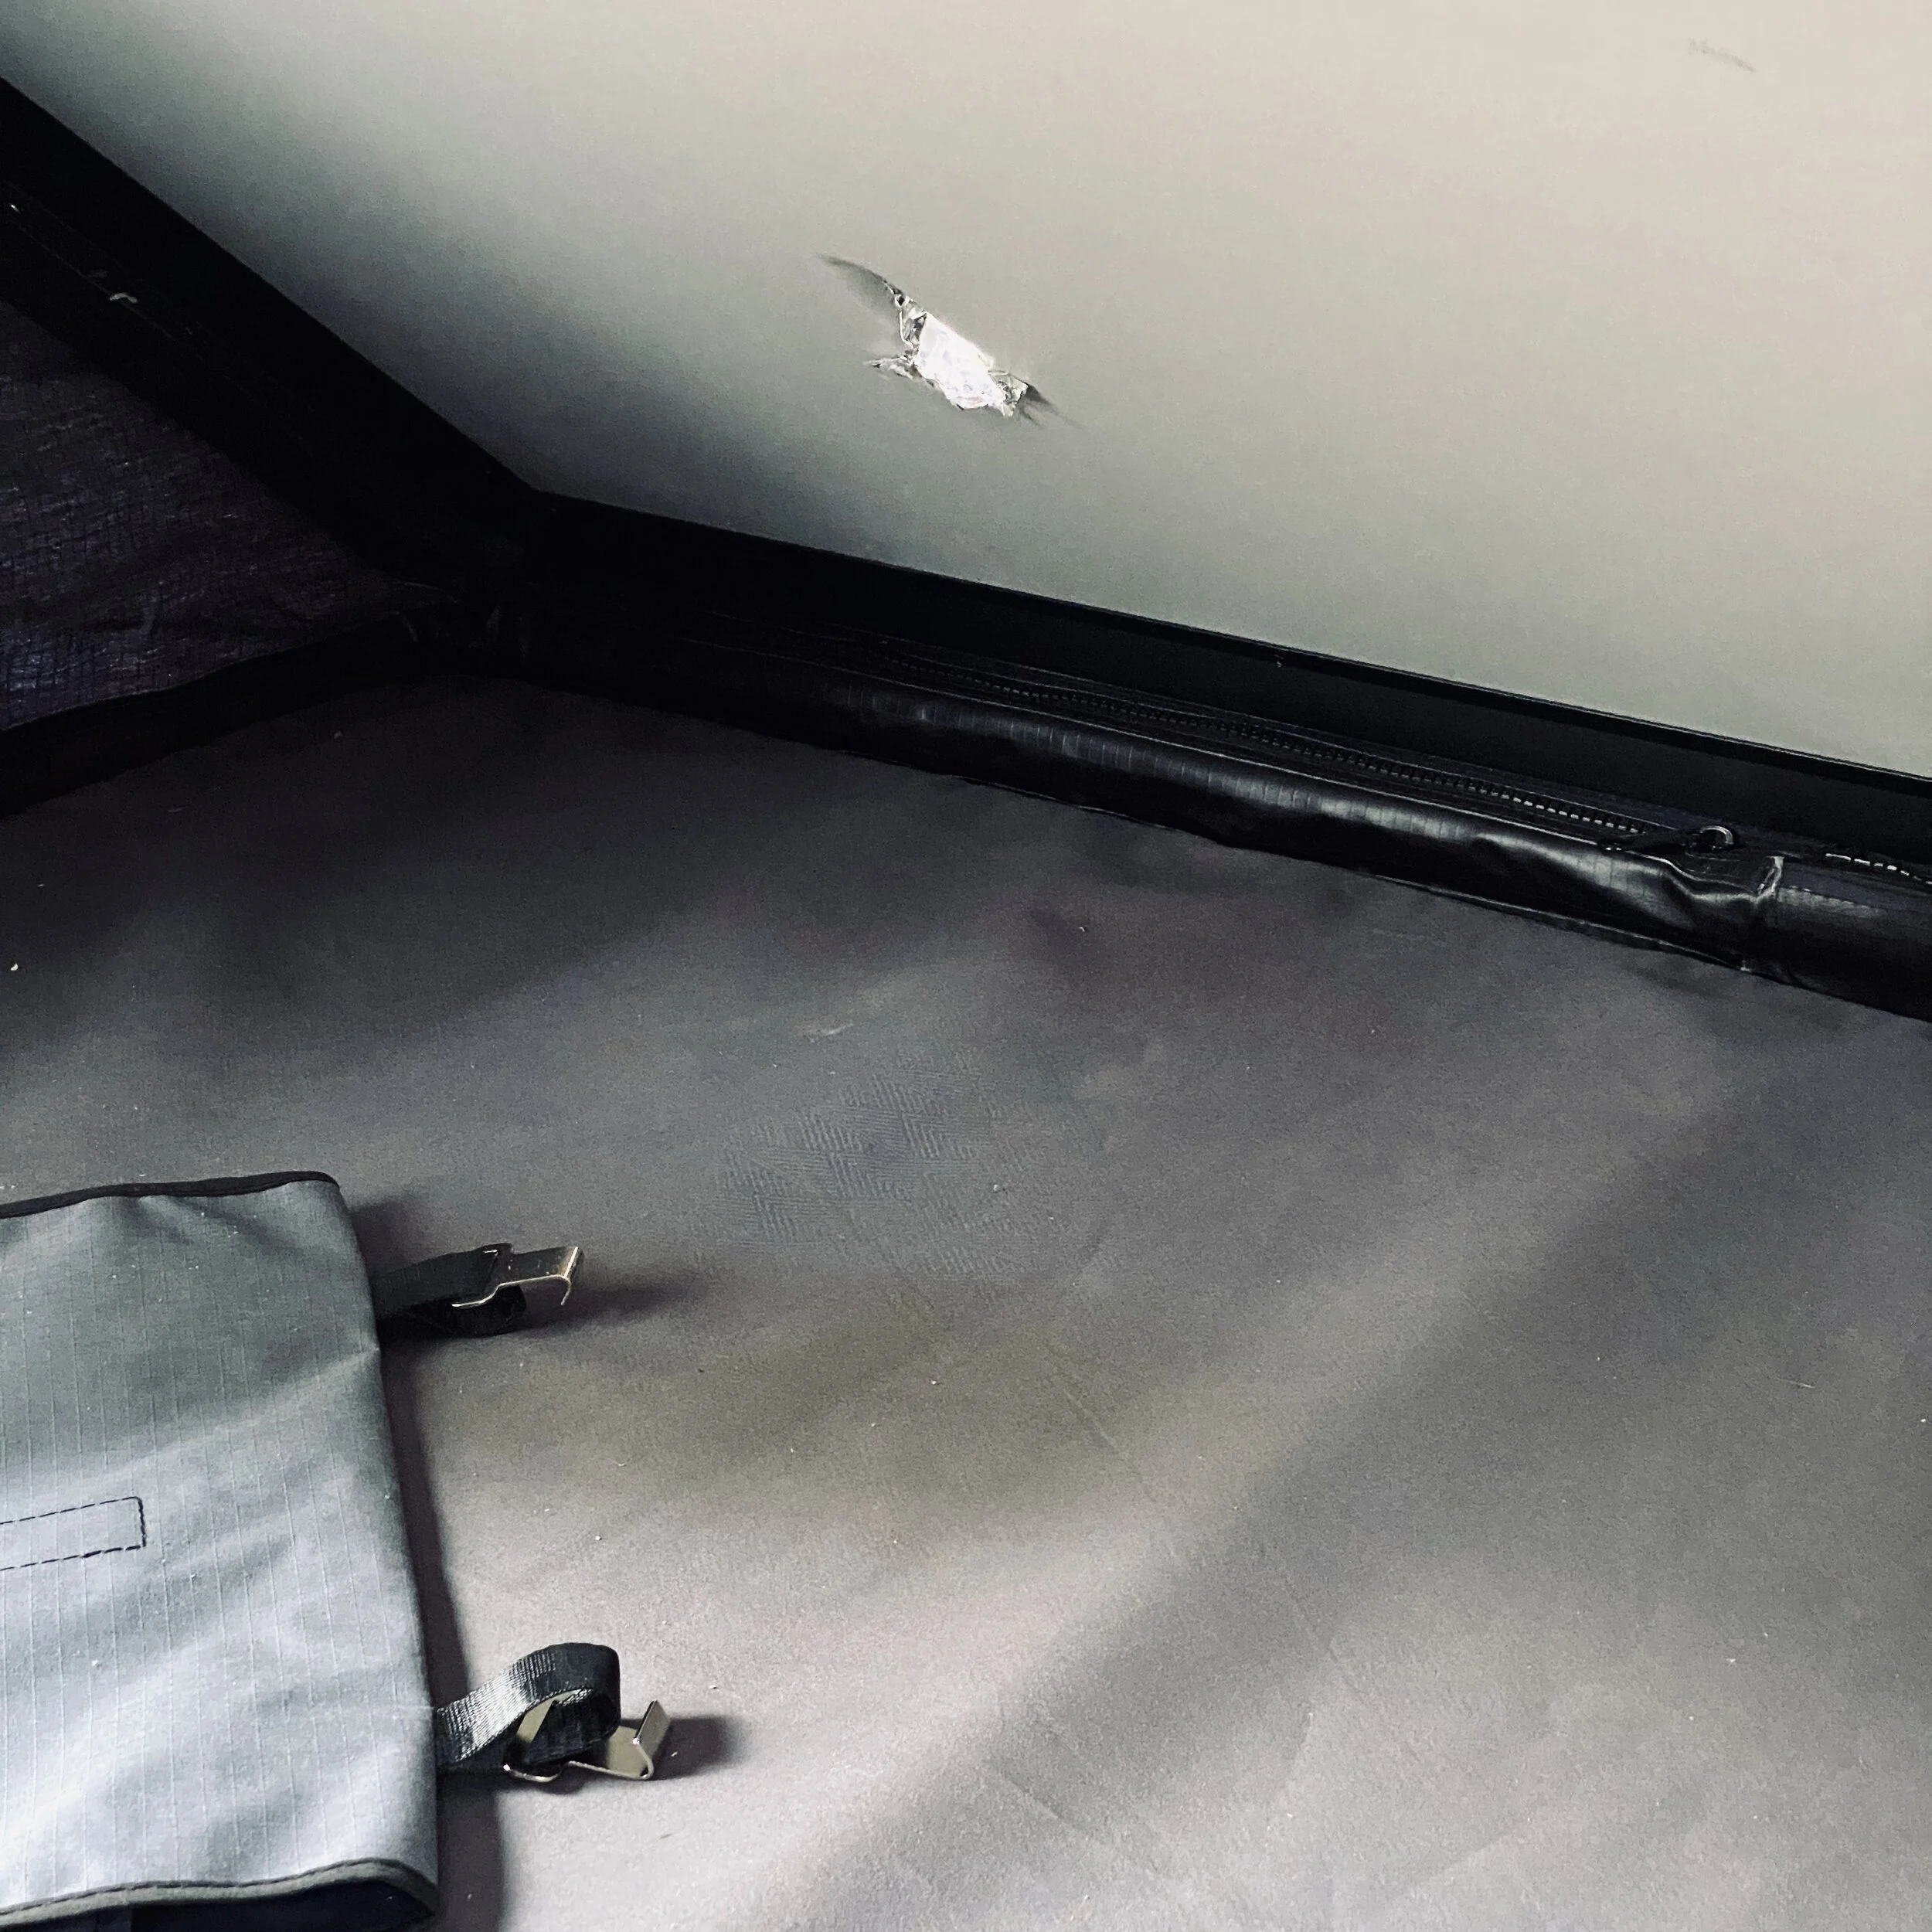
I don’t know exactly what happened, but it looks as though the freight company had a sharp object spear the side of the box. There was a good sized puncture wound in the cardboard, and upon pulling back the protective bubble wrap, we could see a hole that pierced through the roof and into the main tent. Needless to say, the tent was no longer water tight… we had a new sunroof!

Ouch! The hole discovered as we pulled back the bubble wrap on our new rooftop tent from Area BFE.
Long story short, the shipping company owed us compensation for the damage to the tent, and rather than exchange it for a new one, we decided to pocket the cash and patch this tent. More money for other gear!
So now I know how to patch a hardshell rooftop tent, and should you ever need to have this knowledge, let me help you out!
The hole pierced all the way through the roof of the tent, leaving us with a new sunroof feature. Rather than return the tent for a new one, we opted to take a credit from the shipping company and patch the hole ourselves.
We considered a number of ideas for how to patch the tent, but eventually settled on this one because we felt it would be permanent, water tight, and durable to trail conditions. Obviously only time will tell, but right now we’re pleased with the job. So let’s go over how we did it….
Flatten the Surface
The way our tent was damaged, there was a good amount of metal from the roof that protruded into the interior of the tent. This would prevent a good seal from a patch, so the first step was to flatten the exterior and interior surface. We used a small rubber mallet and carefully tapped the metal flat. I would recommend using a small piece of scrap wood or other material between the tent and the hammer to ensure a flat finish. Take your time and make sure nothing is protruding out from the hole and the patches can be applied to a flat surface.

The jagged edges around the hole needed to be flattened so that nothing stuck up, possibly interfering with the patch job.
Apply a Waterproof Patch
Our primary patch was going to be a large sheet of aluminum that extended a large portion of the tent, but we wanted to start with a basic waterproof patch. This was like an extra insurance policy…. come hell or high water, there will always be something to protect the tent interior against the elements.
For this job, we turned to Flex Tape and two pre-made patches we found sold as a kit at Lowes. These are essentially a heavy duty tape, and they were applied to the exterior and interior side of the hole.

We used these Flex Tape patches to provide the first layer of waterproofing and protection. A fail safe in case our primary patch ever fails.

The Flex Tape patch applied to the outside of the tent. Another patch was applied to the interior as well.
Cut and Prep Aluminum
We wanted to use a piece of metal to patch the roof. Metal is strong, durable, and likely to hold up better against the elements. After much consideration, we settled on using a long piece of aluminum flashing designed to go on the roof of a house.
Exterior flashing isn’t the first thing that came to mind for us, but it makes a lot of sense. As it’s designed for roofing applications, it’s obviously very weather resistant. It can be cut easily, comes in a bunch of shapes, is thick enough to withstand some abuse but thin enough to not add a lot of bulk to the tent roof.
Although the hole in our tent was relatively small, we opted to make the patch extend from edge-to-edge and span the width of the tent. This helps the patch “blend in” and look more natural, while also providing far more surface area for gluing and protecting the patch.
We cut it to size using a box cutter to score the siding twice at the correct length. After scoring, we were able to bend it back and forth a few times until it snapped, creating a nice clean line. We then used a rubber mallet to lightly tap the edges smooth.
After cutting, the metal was painted with 3 heavy coats of Krylon Fusion spray paint and primer. We afforded ample dry time between coats, and the finished paint is even and clean.
For the interior of the tent, we did the same process to make a patch, though this one was smaller and cut to be a perfect square. Lauren painted the patch with a heart and design to add a little personalization and flare to our tent!

We used exterior roofing flashing to make the tent’s primary patch. This roll was sold at Lowes and measures 10” tall by 10’ long. This gave us some extra length in case we messed up a cut.

Applying spray paint to the flashing for a black coat. We used three coats of Krylon Fusion paint and primer (pictured is after the first coat, while it’s still drying… hence the uneven finish).
Glue Exterior Aluminum
To adhere the patch to the roof of the tent, we used two packages of JB Weld epoxy; this stuff is known to be some of the most durable and hardy epoxy on the market! The epoxy was applied in an even coat with a putty knife and allowed to dry overnight. During the drying process, we evenly distributed approximately 100lbs of weight on top of the patch; this ensured a good contact gluing.

The patch was then glued to the surface of the tent using some JB Weld Epoxy. Pardon the dust… repair still in progress!
Glue Interior Aluminum
For the interior patch, we glued it using Gorilla Glue. Since the patch is on the inside roof, we had to be creative for attaching and applying pressure to the patch while the glue cured; in this case, we covered the patch with a thin sheet of parchment paper and folded a towel below the patch. When the tent closed, the towel applied enough upward pressure on the patch to hold it in place for an overnight cure.

The interior patch hung and ready to dry overnight. We used parchment paper and painters tape to hold the patch in place for positioning, and then the folded towel applied upward pressure once we closed the tent.
Waterproofing Caulk
Arguably the most difficult part of the repair came at the end. Even though we’re confident in the JB Weld epoxy, there’s a chance that water could get under the seam a little during the wintertime, and when it freezes, could expand enough to pry up the patch. The risk of that wasn’t worth taking, so we opted to seal the seams with a waterproof caulk. The idea is to prevent any and all water from ever getting underneath the patch, ensuring a long and durable seal.
We opted for a waterproof black caulk designed for windows and doors. It is advertised to expand and survive at least 10 years of all weather abuse. Good enough!
Applying the caulk was a bit of a challenge; normally you caulk something with a little more of a defined edge, but with patience, we got a job that we felt comfortable would survive the elements and looked pretty good. One trick we discovered is to use blue painters tape to mask off a caulk line (treat the caulk like you would paint, and imagine taping off a line on the tent). This yielded a more clean finish. It took two applications of caulk to get a finish we were pleased with.

Waterproof caulk was applied around all of the seams to provide years of durability and protection against rain, frost, and ice.
Admire!
All said and done, we’re pretty pleased with how the repair turned out, and it cost about $30 in materials to achieve. Not bad. We will report back on how the patch holds up to use and abuse, but for now, we’re happy to have a patched up tent that is now certified as adventure ready once again!

The nearly complete patch! We will add more pictures once the tent is mounted to the Jeep and update with how this repair holds up over time.

The interior patch. Lauren painted it to add some flare and character, as well as personalization, to our living space.
Have you patched a rooftop tent? Have any advice to offer? Leave a comment and share your hacks!