
Getting Sharp: The Importance of Calibration
You have spent hundreds (thousands) of dollars on camera gear, but are you really getting the best image possible with that lens and camera combination? Do you read reviews about sharp lenses, only to find your photographs never look as impressive as the ones you see online? If you have never calibrated your lenses, then there is a good chance that you are loosing the opportunity to get sharp images.
For instance, see the following photo of a bee pollinating this flower (click to enlarge):
A bee on a flower in an indoor garden in Pennsylvania. Shot with a Nikon D850 + Nikon 200mm f/4 micro lens that was calibrated with the camera.
What is Calibration? Do I Need to Calibrate?
If you have a dSLR camera with autofocus lenses, then you need to calibrate. It does not matter if your camera is only a day old - calibration is not a factor of camera age. Very simply, because your camera and lenses were not manufactured together, there is a slight error that almost certainly exists as the camera and lens communicate in the autofocus mechanism. This error varies lens-to-lens, but exists in virtually every single lens.
The result is that the camera and lens think they have achieved focus, but the resulting images will be out of focus when you look at it later. This is a byproduct of how light is bent around the mirror and prism in the dSLR body, with a different piece of light routed to a focusing element.
Unfortunately, this error probably exists in every lens you own.... even if you have one lens that is perfect, another could be off by a huge factor. So you need to calibrate each lens with each camera individually.
Examples of Calibrated vs Non-calibrated Lens
To help illustrate this, lets look at two photographs I took in a nearby forest. These aren't the best photographs ever in terms of composition, but they do a fine job illustrating the importance of calibration. These photos were taken with the Nikon D850 and Sigma 85mm f/1.4 art lens. The Sigma 85mm lens is considered the sharpest lens ever tested by DxO Labs, so the photos taken with it should blow my mind, right?
The following images shot at f/1.4 with the focus on the scar on the tree bark:

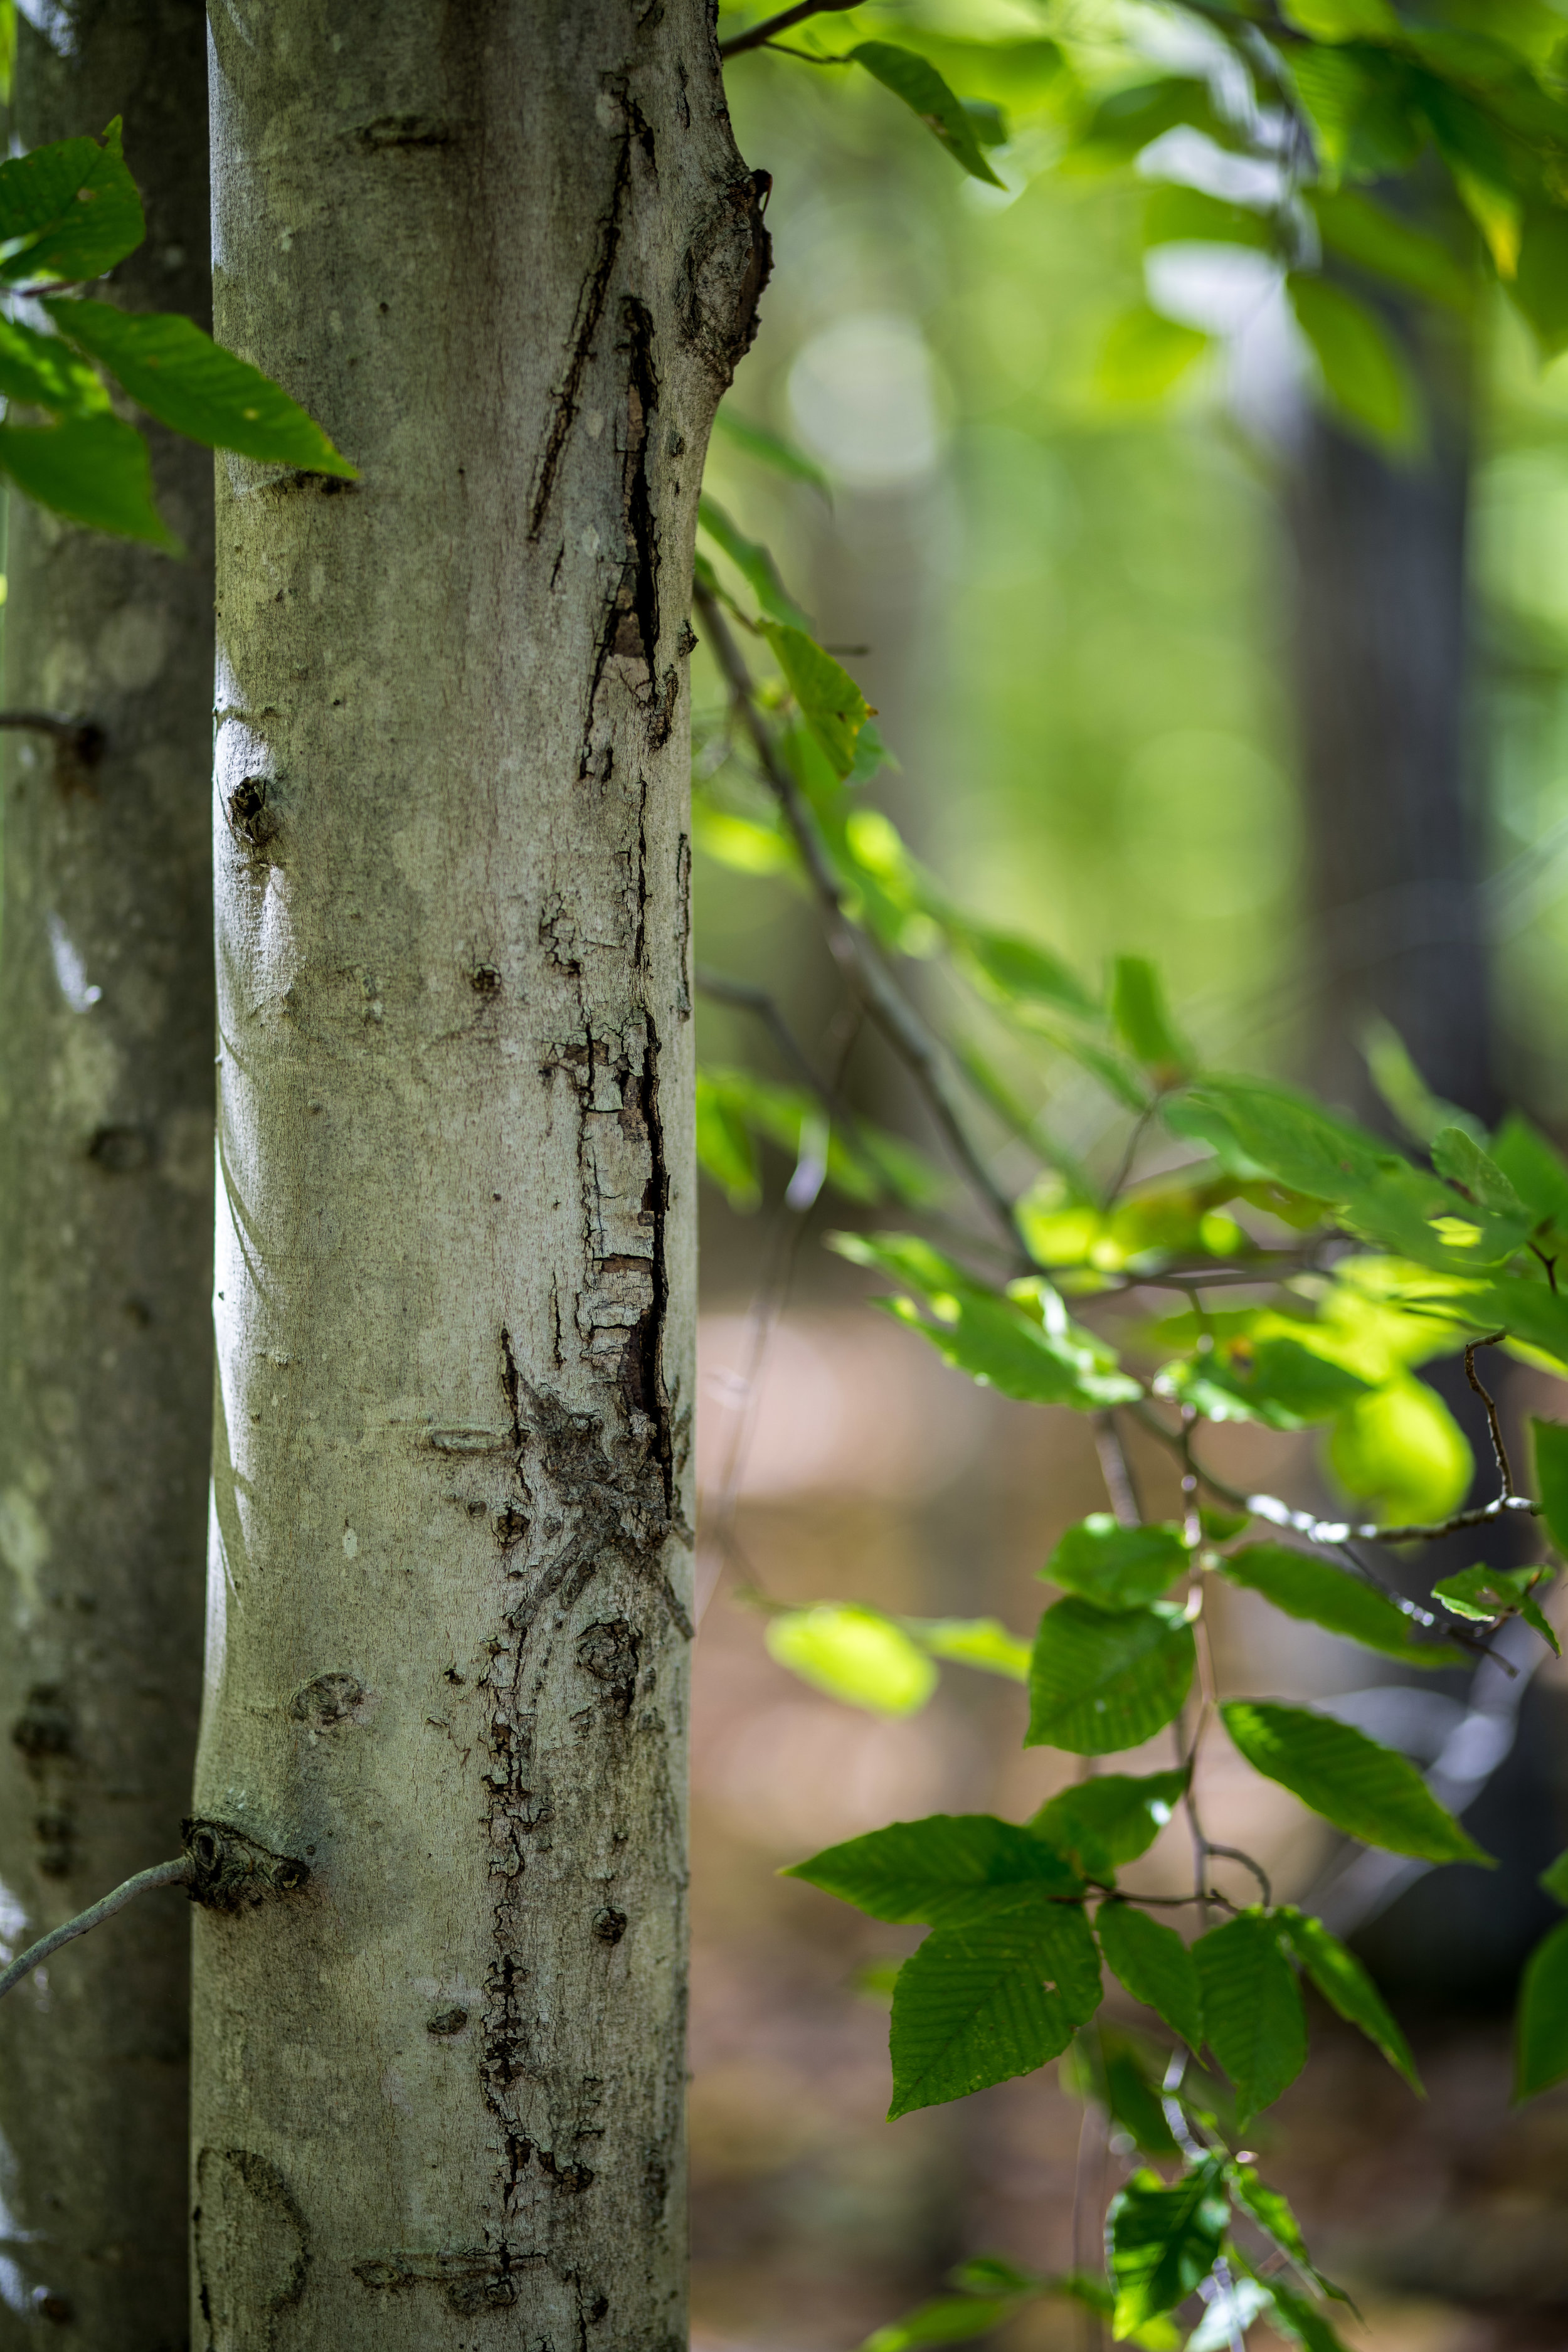
Notice a difference between the image on the left vs right? The one on the left hardly seems sharp.... especially since it supposedly came from the sharpest lens ever tested?! I took several shots and can confirm they all looked like this - clearly out of focus on the area where I was aiming.
Now let's look at the rightimage, with the lens calibration programed into the camera. For this particular lens, the calibration factor was +20. The result here is clearly better. The bark is nice and sharp, with lots of detail. This looks more like the performance from the sharpest lens ever tested....
Here is one more view, side by side, of the two images cropped in on the focus area.
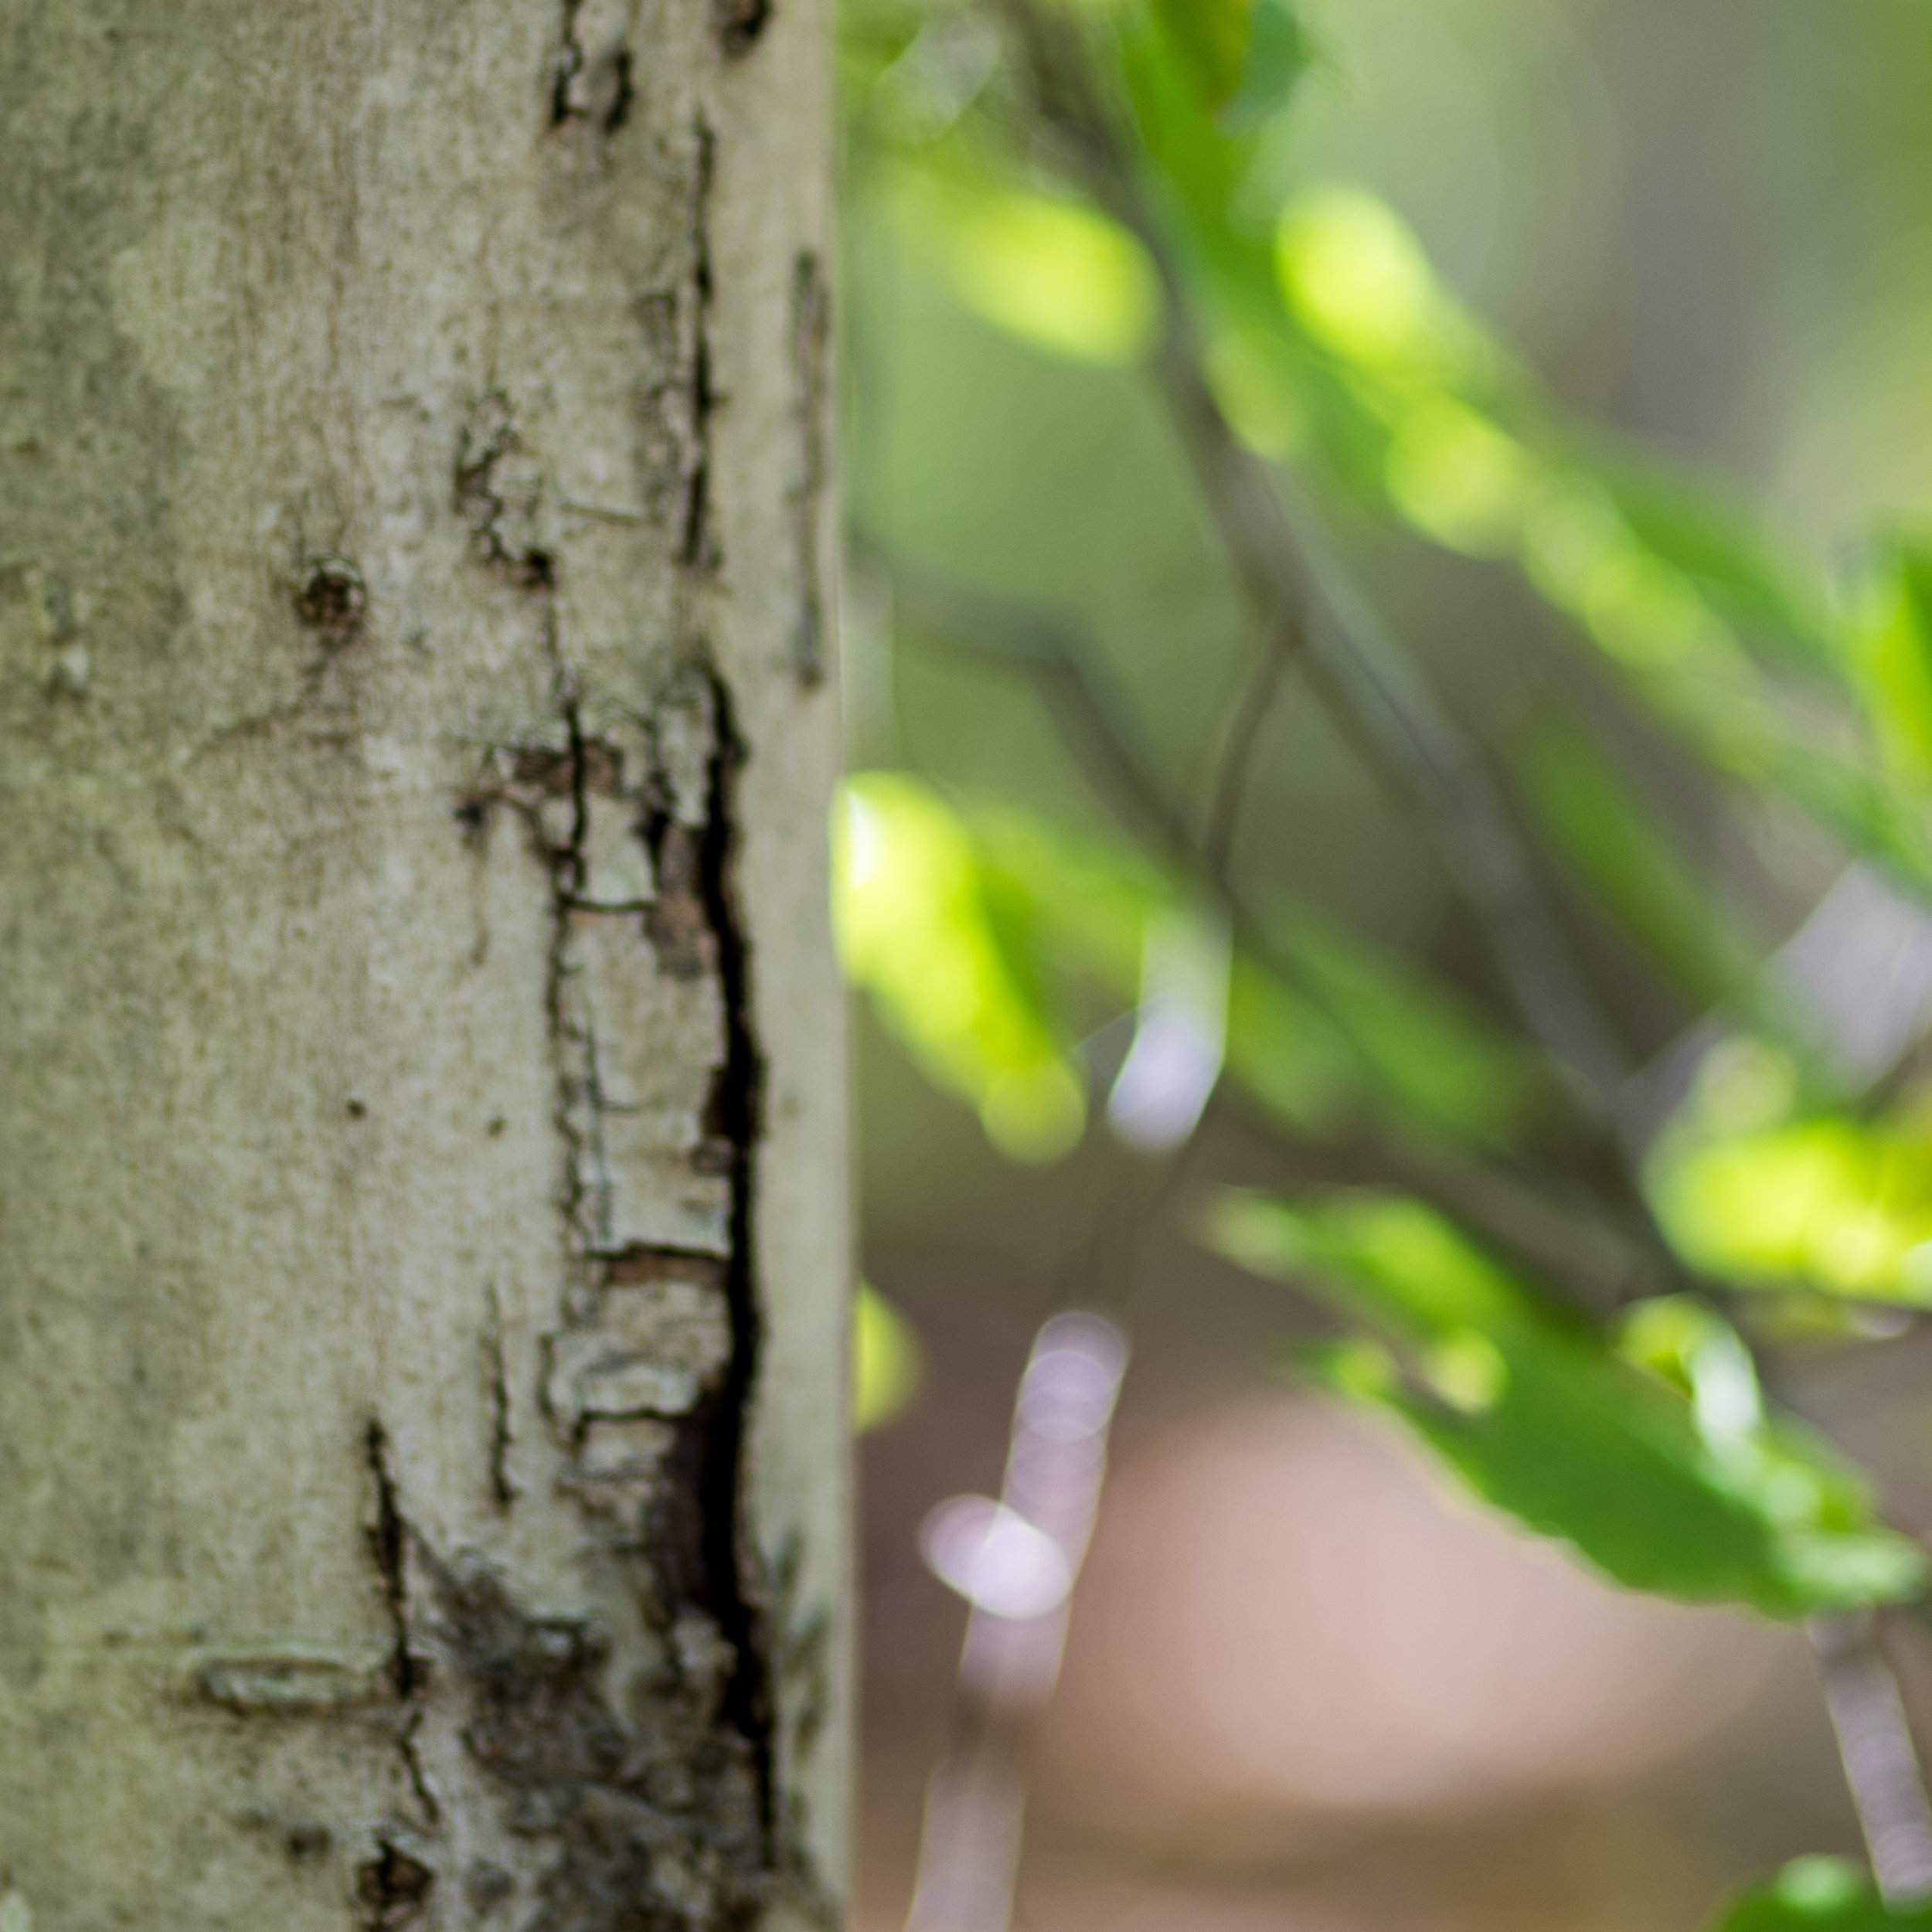
The non-calibrated image

With lens calibration activated
Bottom line: As you can see from the above images, calibration has a huge impact on the sharpness of your photos. And if you are shelling out the big bucks for camera and lenses, then you should be prepared to spend another $100(ish) to calibrate them.
Lens Align & Focus Tune
The Lens Align target. It is best arranged with a neutral background. I used a cheap $8 tripod to hold the Lens Align.
Without question, the top product on the market for calibrating your own lenses is the Lens Align Focus Calibration System and Focus Tune Software. Designed by Michael Tapes, it's easiest and recommended to buy both products together as you will get the best results by using both.
Lens Align
The Lens Align Focus Calibration System is a set of precision manufactured targets that you use to measure optimal sharpness and identify front/back focus alignment issues. The target includes a vertical front panel of calibration targets and a horizontal "ruler" with geometric designs that the Focus Tune software can read. While it's possible to buy and use the Lens Align without Focus Tune, it really doesn't make much sense.
Focus Tune
The Focus Tune software accompanies the Lens Align, and you really can't use the software without the target. The software will help evaluate the sharpness of each image and will measure the front/back focus, helping you identify the best focus adjustment for the lens.
Basic Calibration How-To
For starters, you need to have the Lens Align target, a good tripod for your camera, a cheap tripod for your Lens Align target, and - ideally - the Focus Tune software. You also need to make sure your camera will permit lens calibration / lens alignment adjustments.
A comprehensive set of instructions is found in this YouTube video - the below directions are designed to give a basic overview of using the system.
The Focus Tune software with all of the images imported and the neon green target set.
Setup your camera, lens to be adjusted, and Lens Align. Use a tripod for the camera and Lens Align. A cheap tripod works best for the target, while you need a sturdy tripod for the camera.
Align the camera and target according to the specifications of the lens (see instructions).
Set the camera to JPEG fine, low ISO (400 or below), and the maximum aperture of the lens (f/1.4, f/2,8, etc)
Shoot a series of five images at the following focus tune adjustments: -20, -15, -10, -5, 0, 5, 10, 15, 20. Defocus the lens between each shot so that the camera has to refocus.
Use Focus Tune to find the cluster of images that is sharpest, then shoot another set of images to refine the setting. For instance, if the sharpest images appeared around 10-15, shoot another series of fives images at adjustment value 10, 11, 12, 13, 14 and 15.
Use Focus Tune to find the sharpest images and identify the value for that particular lens.
Although the camera should remember each setting for the lens in the internal memory, it's a good idea to write them down
Rinse and repeat with each lens!
Sounds easy enough - and it really is! Taking 30 minutes to watch the video instructions will equip you with all the details for the process, but it is really straight forward. Once I knew what I was doing, it took no more than 20 minutes per lens to complete.
But what about zoom lenses? Personally, I calibrated a zoom lens at the focal lengths that will get the most use. For instance, I calibrated my 24-70mm lens at 50mm. A quick test showed that the setting identified for 50mm was also good for other focal lengths. Likewise, if you are using a teleconverter, you should calibrate the lens with and without the teleconverter as you may get different values for each.
Refining Focus with Focus Tune

A screenshot of the output from the Focus Tune software. The graphic depicts that most of the shots have a front focus issue, but that the last cluster of images are very close to accurate on the sharpness. After additional refinement, it was determined an adjustment of +20 was best for this particular lens.
The Focus Tune software really is pretty incredible, and a good buy for anyone calibrating their lenses. In a matter of a few clicks, the software will read each image, evaluate it for sharpness and front/back focus, then will generate a chart and table with focus values. The ideal is to get focus values close to 0. Negative numbers denote front focus, while positive numbers are back focus.
Looking at the graph on the right, we can see that I had the Nikon D850 setup with the Sigma 85mm f/1.4 lens. The clusters I imaged were all front focused, and badly so (as you noticed from the earlier tree bark photos).
Only the last cluster of images (shot with a focus adjustment of +20 in camera), were remotely close to in focus.
It takes a little trial and error with testing different values, but Focus Tune does a great job of helping you jump directly to the best results so that you can find the optimum value for each lens.
Don't be intimidated if you aren't a math major - Michael Tapes makes some great how-to videos to orient you to the whole process.

Focus Tune will show you the sharpest images and overlays a red mask on the calibration ruler, allowing you to see where the precise focus area lies.
Finalizing the Calibration
Once you have completed the whole process, you will have values ranging between -20 and +20 that represent the lens calibration that needs to be dialed into your particular camera. I would also recommend writing these values down, because they could drift over time, and it is good to know where you started.

Applying the calibrated lens values for my Nikon 70-200mm lens in my D850.
For reference, these are the values that each of my lenses needed. What you'll see is that every lens required some adjustment - which is why calibration is so important.
Nikon 14-24mm: +1
Nikon 24-70mm: +14
Nikon 70-200mm: +12
Nikon 70-200mm w/1.4 Tele: +8
Nikon 300mm: +6
Nikon 300mm w/1.4 Tele: +6
Sigma 85mm Art: +20
In closing, I hope this blog has helped you understand what lens calibration is, why it is so important, and provided a brief introduction into the process.

The super detail - eyes, pollen, and little hairs - are only possible from an accurately calibrated lens.