
Mounting a Rooftop Tent on a Rhino Rack Pioneer Platform
We run a Maximus-3 Rhino Rack Pioneer Platform on our 2019 Jeep Wrangler, which is a fantastic rack setup…. cannot recommend it enough!
For a quick background, the Pioneer Platform is a heavy duty rack that mounts onto the fiberglass roof of a Jeep by drilling through the roof, and then attaching supports that mount to the body frame of the Wrangler. While it’s a bit of work to install, the result is an incredibly versatile roof rack that can hold up to 900lbs static weight! It’s also incredibly low profile…..
…. which is a problem if you want to mount a rooftop tent!

“Lola” the Jeep waiting for the tent to be installed onto the roof rack. As you can see, the rack sits very flush to the roof.
Most rooftop tents are designed to mount to a traditional roof rack consisting of two bars that run in parallel. But the Pioneer Platform doesn’t have this sort of arrangement.
After some initial struggles, we identified a mounting solution that allows us to mount our rooftop tent to the top of the Pioneer Platform. It’s very low profile, easy to install, and requires roughly $20 worth of hardware from Home Depot.
The basic idea is that we installed new hardware on the tent in place of the rails that came on the tent. Our inspiration for the design came from this YouTube video; we took his design and tweaked it for our specific tent.
Just like he did, we drilled new holes in the bottom of the tent that were 36.5” apart (corresponding to the width of the bars on the platform) and installed some new hardware. One difference in our setup is that our particular tent — a CVT Mt. Shasta — has little plastic pieces on the bottom that protrude down slightly, so we needed the tent to sit 1/4” off the top of the rack. The solution was to stack 13x metal washers until we had the proper raise.
The finished hardware setup used the following:
3/8 in. x 2 in. Zinc Hex Bolt (x4)
1/2 in. x 2 in. Metallic Stainless Steel Fender Washer (x64)
3/8 in. Strut Channel Spring Nut (x4)
3/8 in lock washers (x4)
3/8 in neoprene washers (x4)
The new hardware threaded through the bottom of the tent.

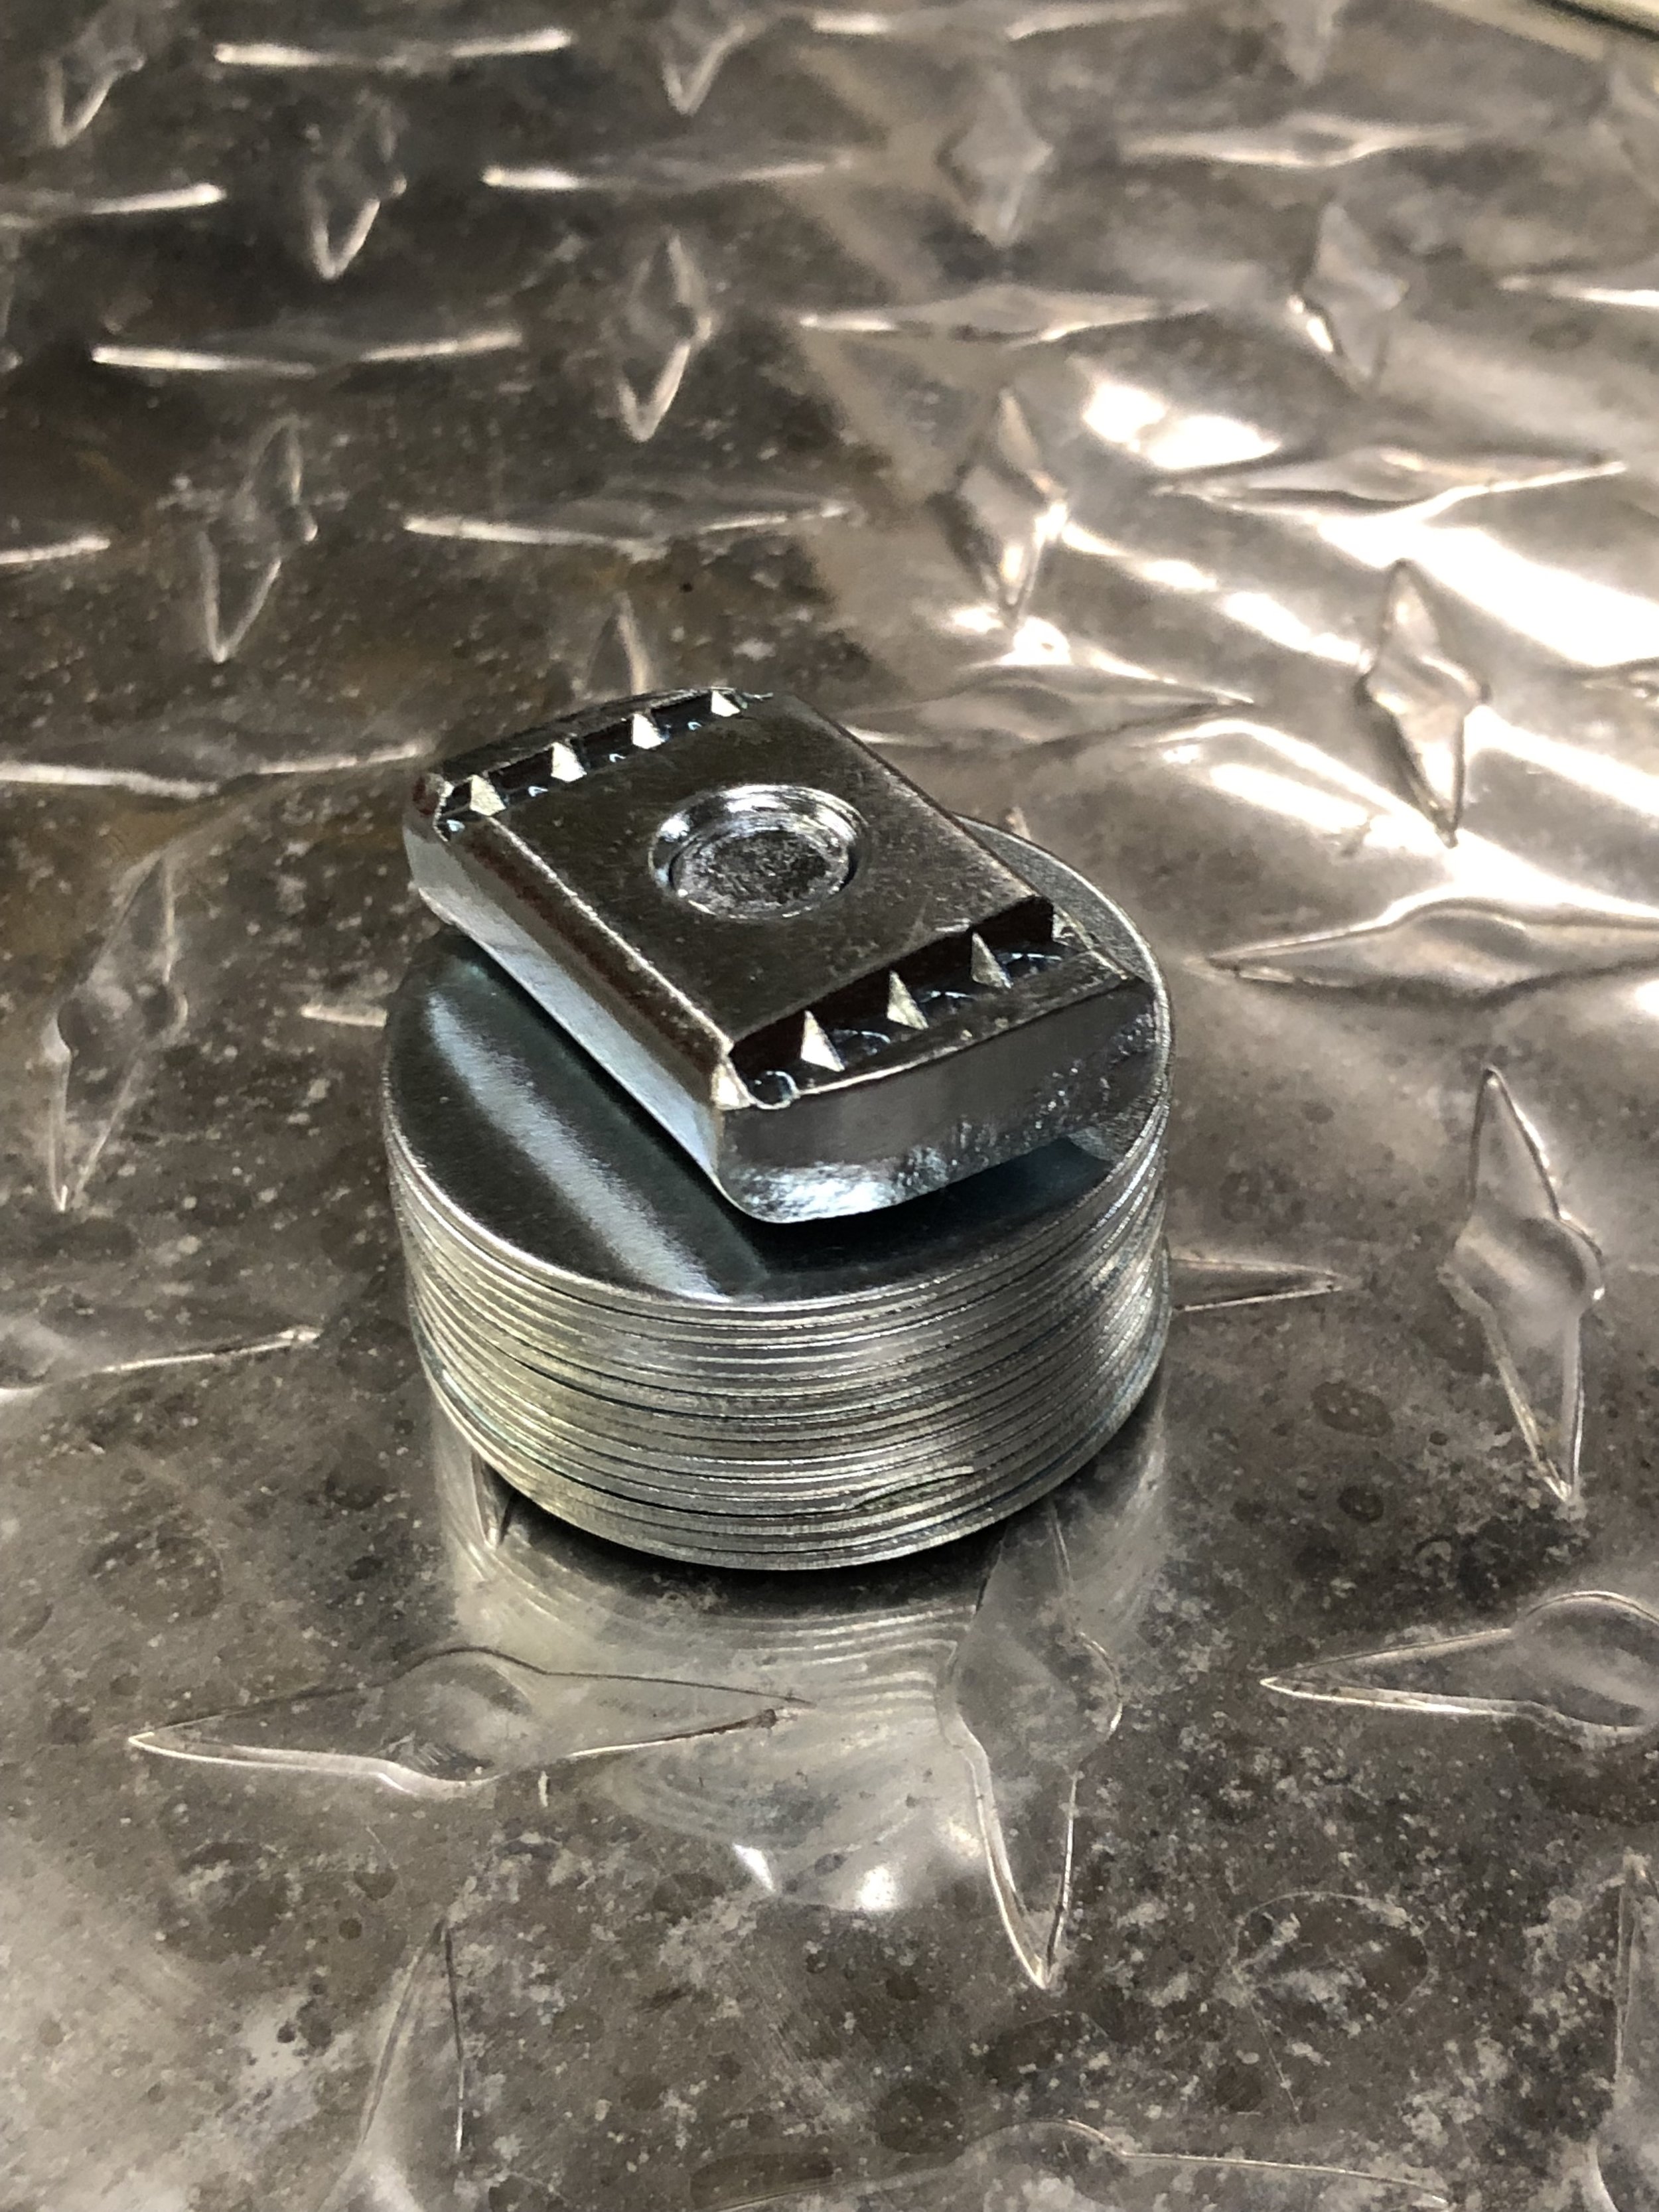
Notice how little space is left — this provides enough room for the channel nut to fit into the tracks on the roof rack and tighten down. The tolerance here is tight, and we had to use extra washers to close this gap.
Installation Instructions:
Remove the rooftop tent from the vehicle and place on the ground or a safe work surface
Remove any pre-installed rails or hardware from the bottom of the tent. Also remove the bolts that hold the ladder. You want the tent to have nothing on the bottom of it.
Decide what direction you want the tent to open, and if you want the tent to be perfectly centered on the rack, or slightly off center. We opted for a slight off-centering, but it’s not terribly noticeable. These decisions will depend on your vehicle and personal preference, so give some consideration to them before you start drilling.
Once you have identified the desired location for the tent, mark two holes 36.5” apart on one end of the tent. Take care to make sure the center of the hole is exactly 36.5” apart. This spacing corresponds to the width of the rails on the Rhino Rack platform. We used blue painters tape to mark the holes on the bottom of the tent.
Measure holes to match on the opposite side of the tent. You should have four holes that will line up to where you want the tent to mount on the rack. Measure twice!
Drill through the tent to make the four bolt holes. Be sure to have help! You don’t want to drill into the tent fabric or mattress, so you might need to prop the tent up while you drill. We recommend starting with a pilot hole and then using a bigger bit to drill the final hole.
Slide the hardware into the holes. Inside the tent, you will have one large spacer washer and a lock washer, along with the bolt head. As the bolt comes through the tent, mount one neoprene washer, 13x flat washers, and the channel nut. (see above pics).
Re-attach the tent ladder, and (optional) fill any old holes with clear silicone. This will help keep bugs from entering the tent floor.
With help, lift the tent onto the roof rack. Once all four channel nuts are in the tent, you can open the tent back up and crawl into the inside. From the inside, use a socket wrench to tighten down the hardware.
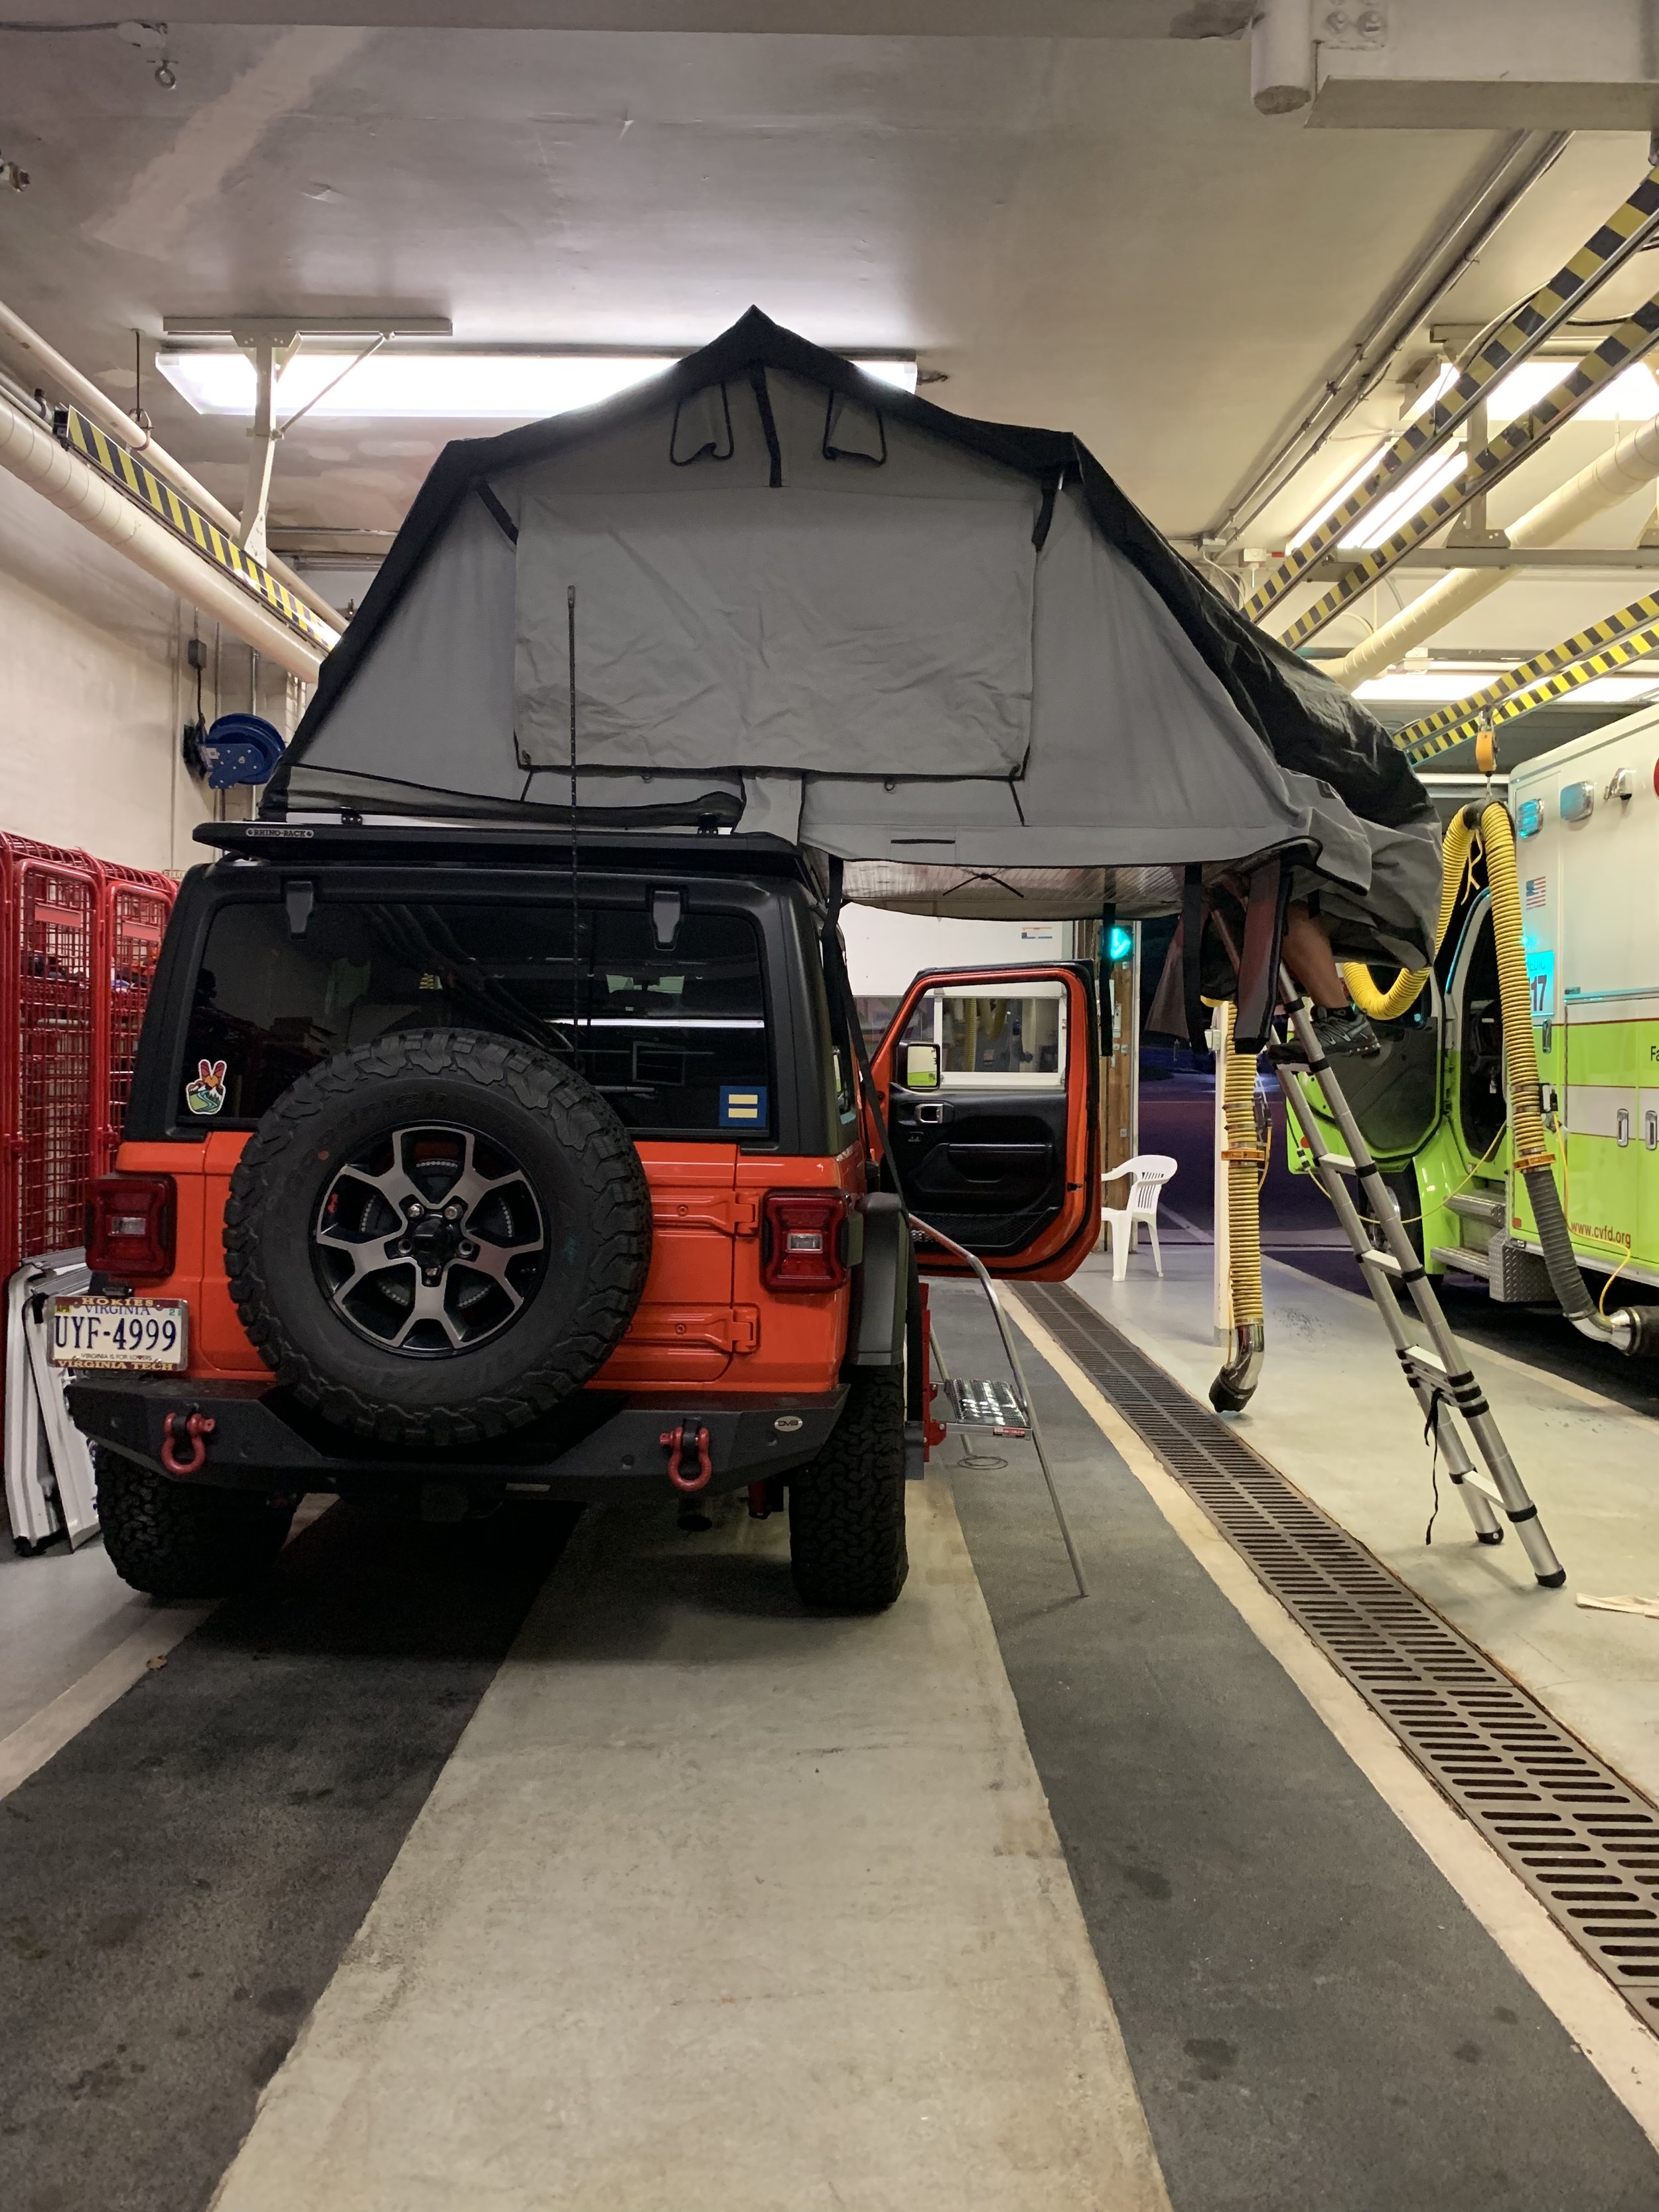
Tightening the hardware inside the tent…. You can see Kristen’s legs sticking out the bottom of the tent as she makes final adjustments to the hardware inside the tent.
We installed the tent onto the roof exactly the same way as shown in the video posted by Sketchy Jeep. Our setup differs slightly because our tents are different, but the concept is the same.
We’ve loved this setup, and it’s extremely secure. We had no issues using it in the field, and are very happy with how the whole thing came together.
Good luck in mounting your tent!

A look at the hardware sandwiched between the bottom of the tent and the top of the rack. You can see how we used a stack of washers to raise the tent slightly off the platform to account for some straps that are permanently attached to the bottom of our tent.

All mounted up and ready to go!