
InPowered Adventures: Installing an Aux Battery in a Jeep JL
Adding a 12V auxiliary battery setup to the Jeep was never a question of “should we” - it was always a question of “where should we?” The problem that comes up is that these batteries can be large and bulky, so placement in your overland rig can be tricky. In this post, we’ll walk you step-by-step through installing a 12V power system into a Jeep Wrangler JL using Kick Ass Products USA’s 170ah AGM slim battery and their DCDC charger with MPPT controller. These instructions also outline how to build a module to hold everything that is compatible with the Goose Gear drawers that many of us regard as a “must have” overland accessory. Feel free to modify and adapt these directions for your own setup, and send us a link or some pictures to your build.

Where to Install an Auxiliary Battery Setup in the Jeep Wrangler JL
As mentioned before, the challenge with these systems stems from one of space… where to place a battery system that is accessible yet out of the way. One common place that many people stash a spare battery is under the hood of the vehicle, using an aftermarket kit to house a second battery. Although there is an option to do something like this available for Jeeps (sold by Genesis Offroad), it was not the right solution for us for a variety of reasons.
One of my favorite things about the Kick Ass offerings was the availability of a slim battery. There are very few options for batteries in the US that are anything other than the standard brick (like the battery under the hood of your car…not small), which can be hard to place in an overland rig. Kick Ass understood this, designing two slim AGM batteries - 170ah and 120ah options. As far as I’ve found, they are the only company offering a large capacity slim AGM battery in the US market right now for this sort of application.
Excited by the prospect of a slim battery, I started mulling and engineering a spot to put it. Initially I thought it might fit standing upright behind the rear seat of the Jeep (between the back seat and the back of the Goose Gear drawers), but it’s a smidge too tall for that space. It is possible the 120ah slim battery offered by Kick Ass would fit standing upright behind the seat, but I have not tested this. A note, if you went this route, some consideration would have to be given for safely securing the battery there since it is a tight space.
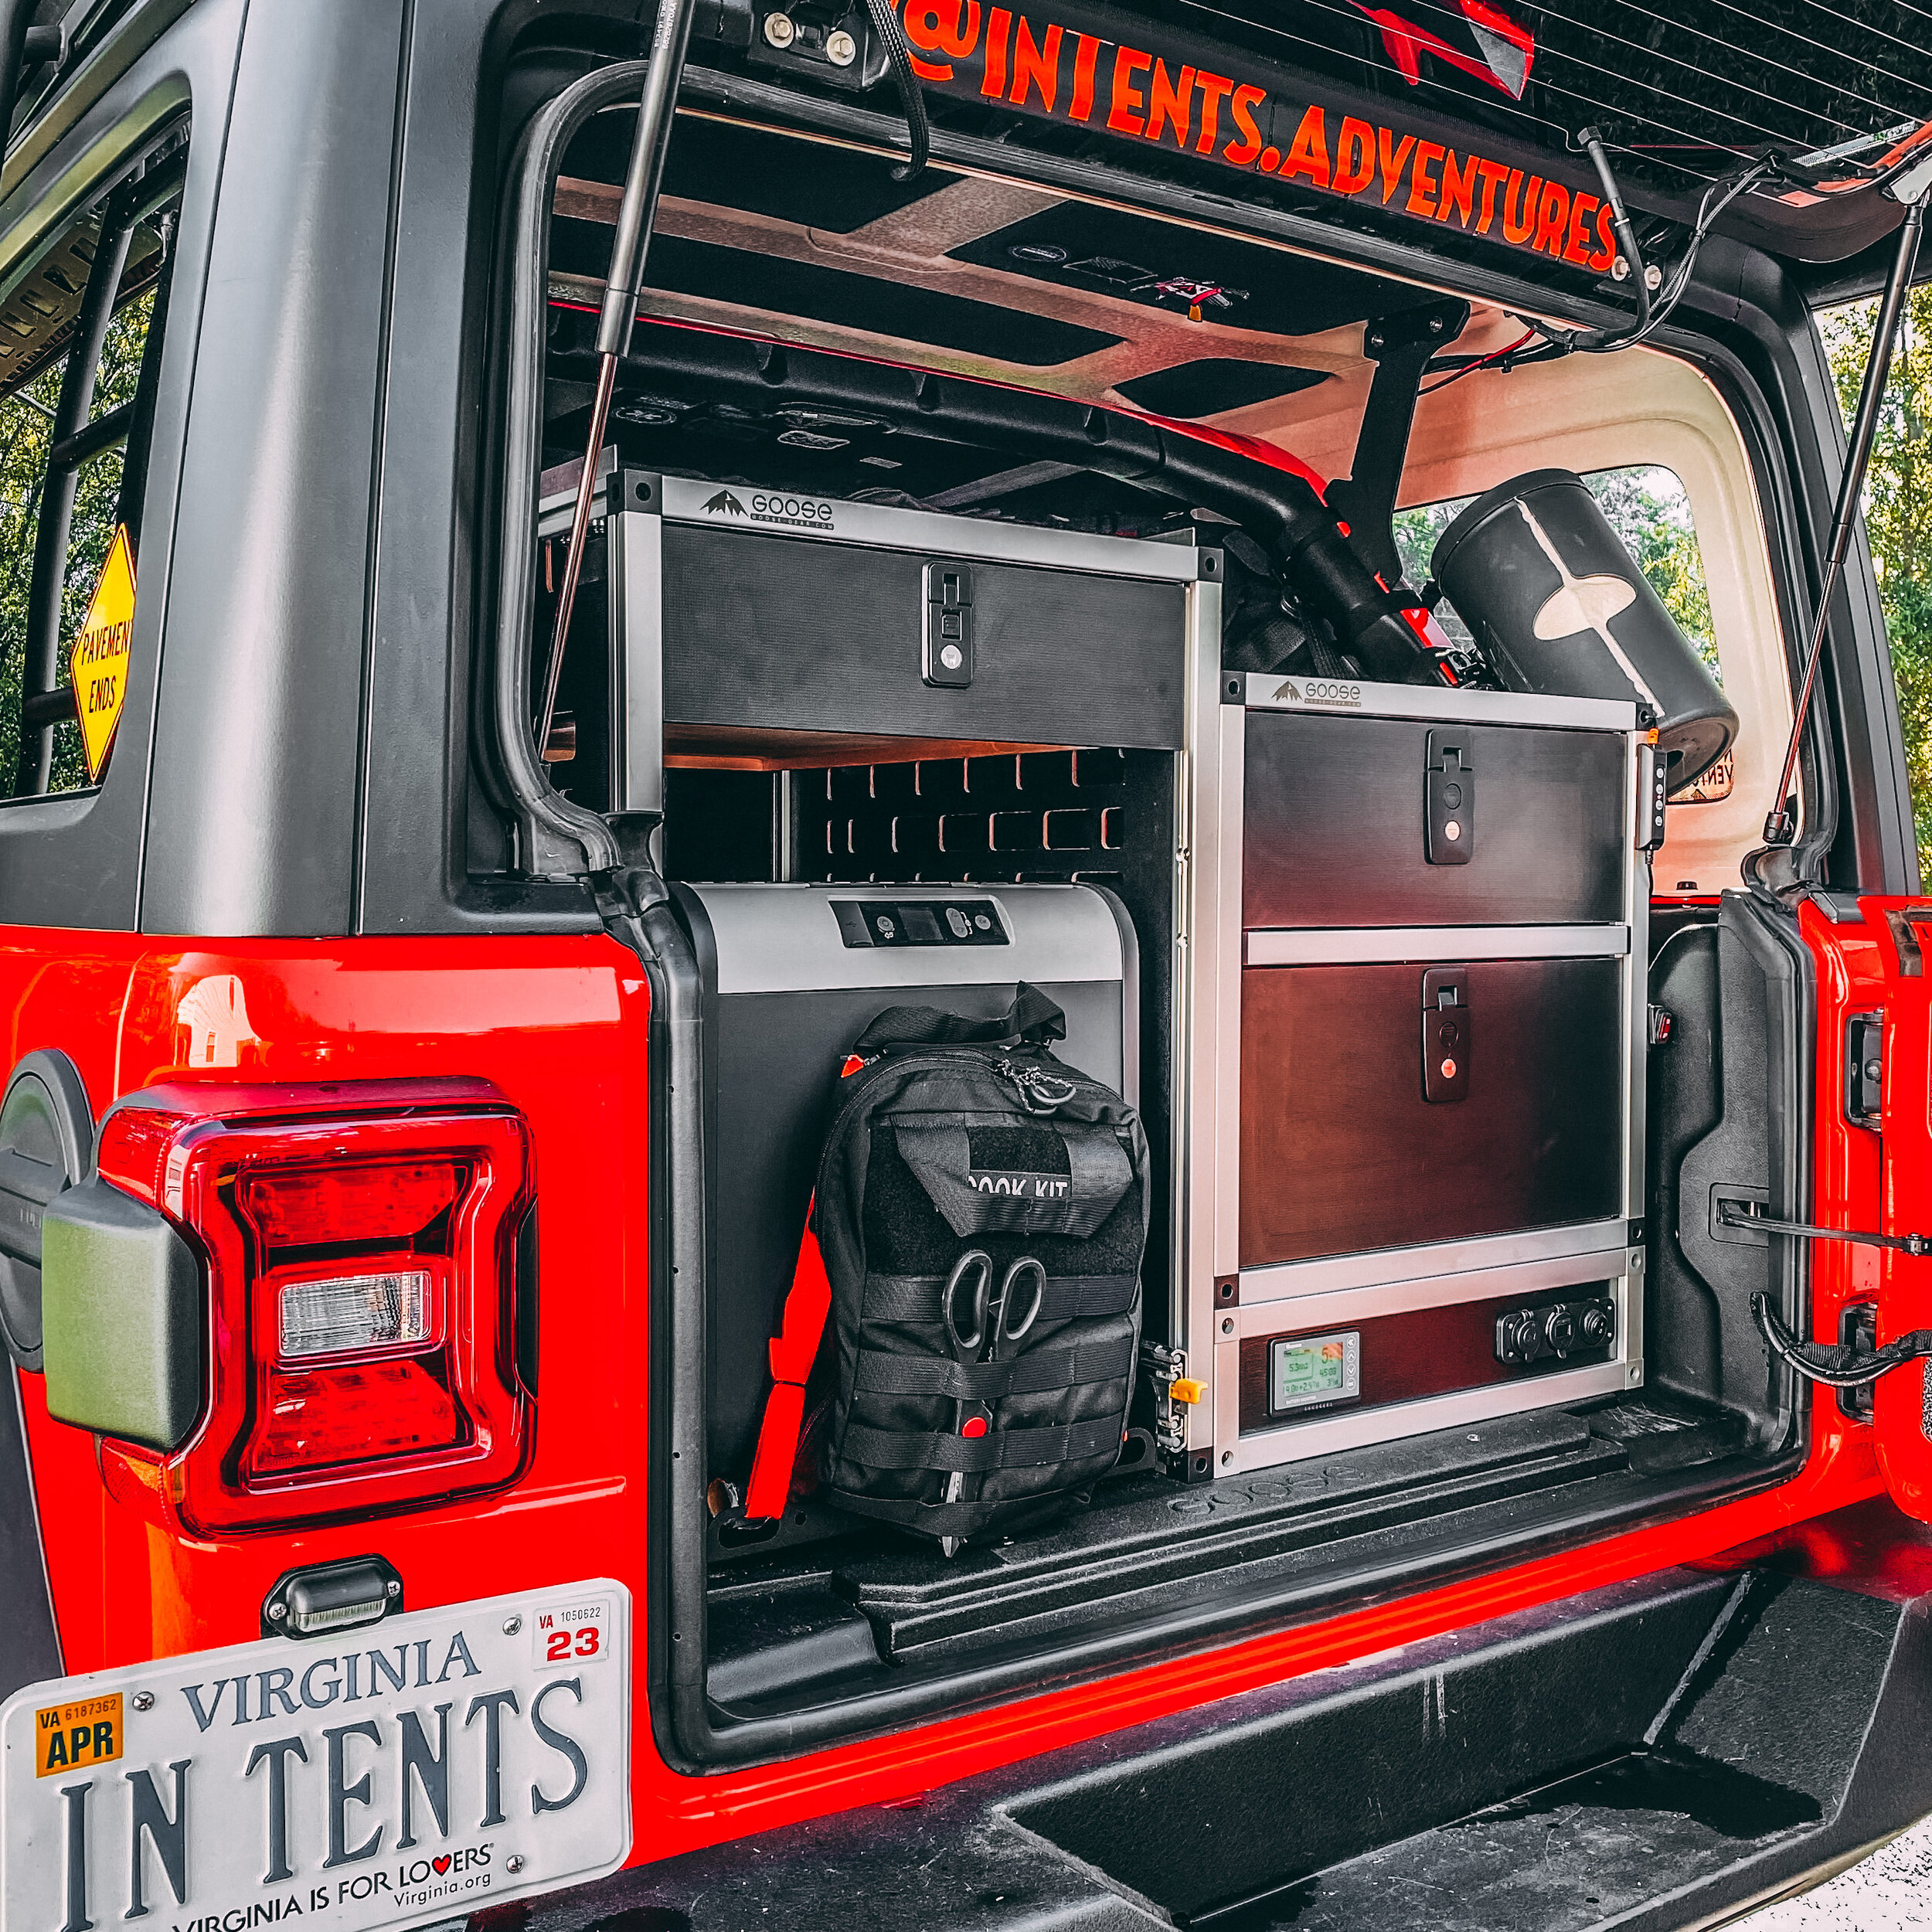
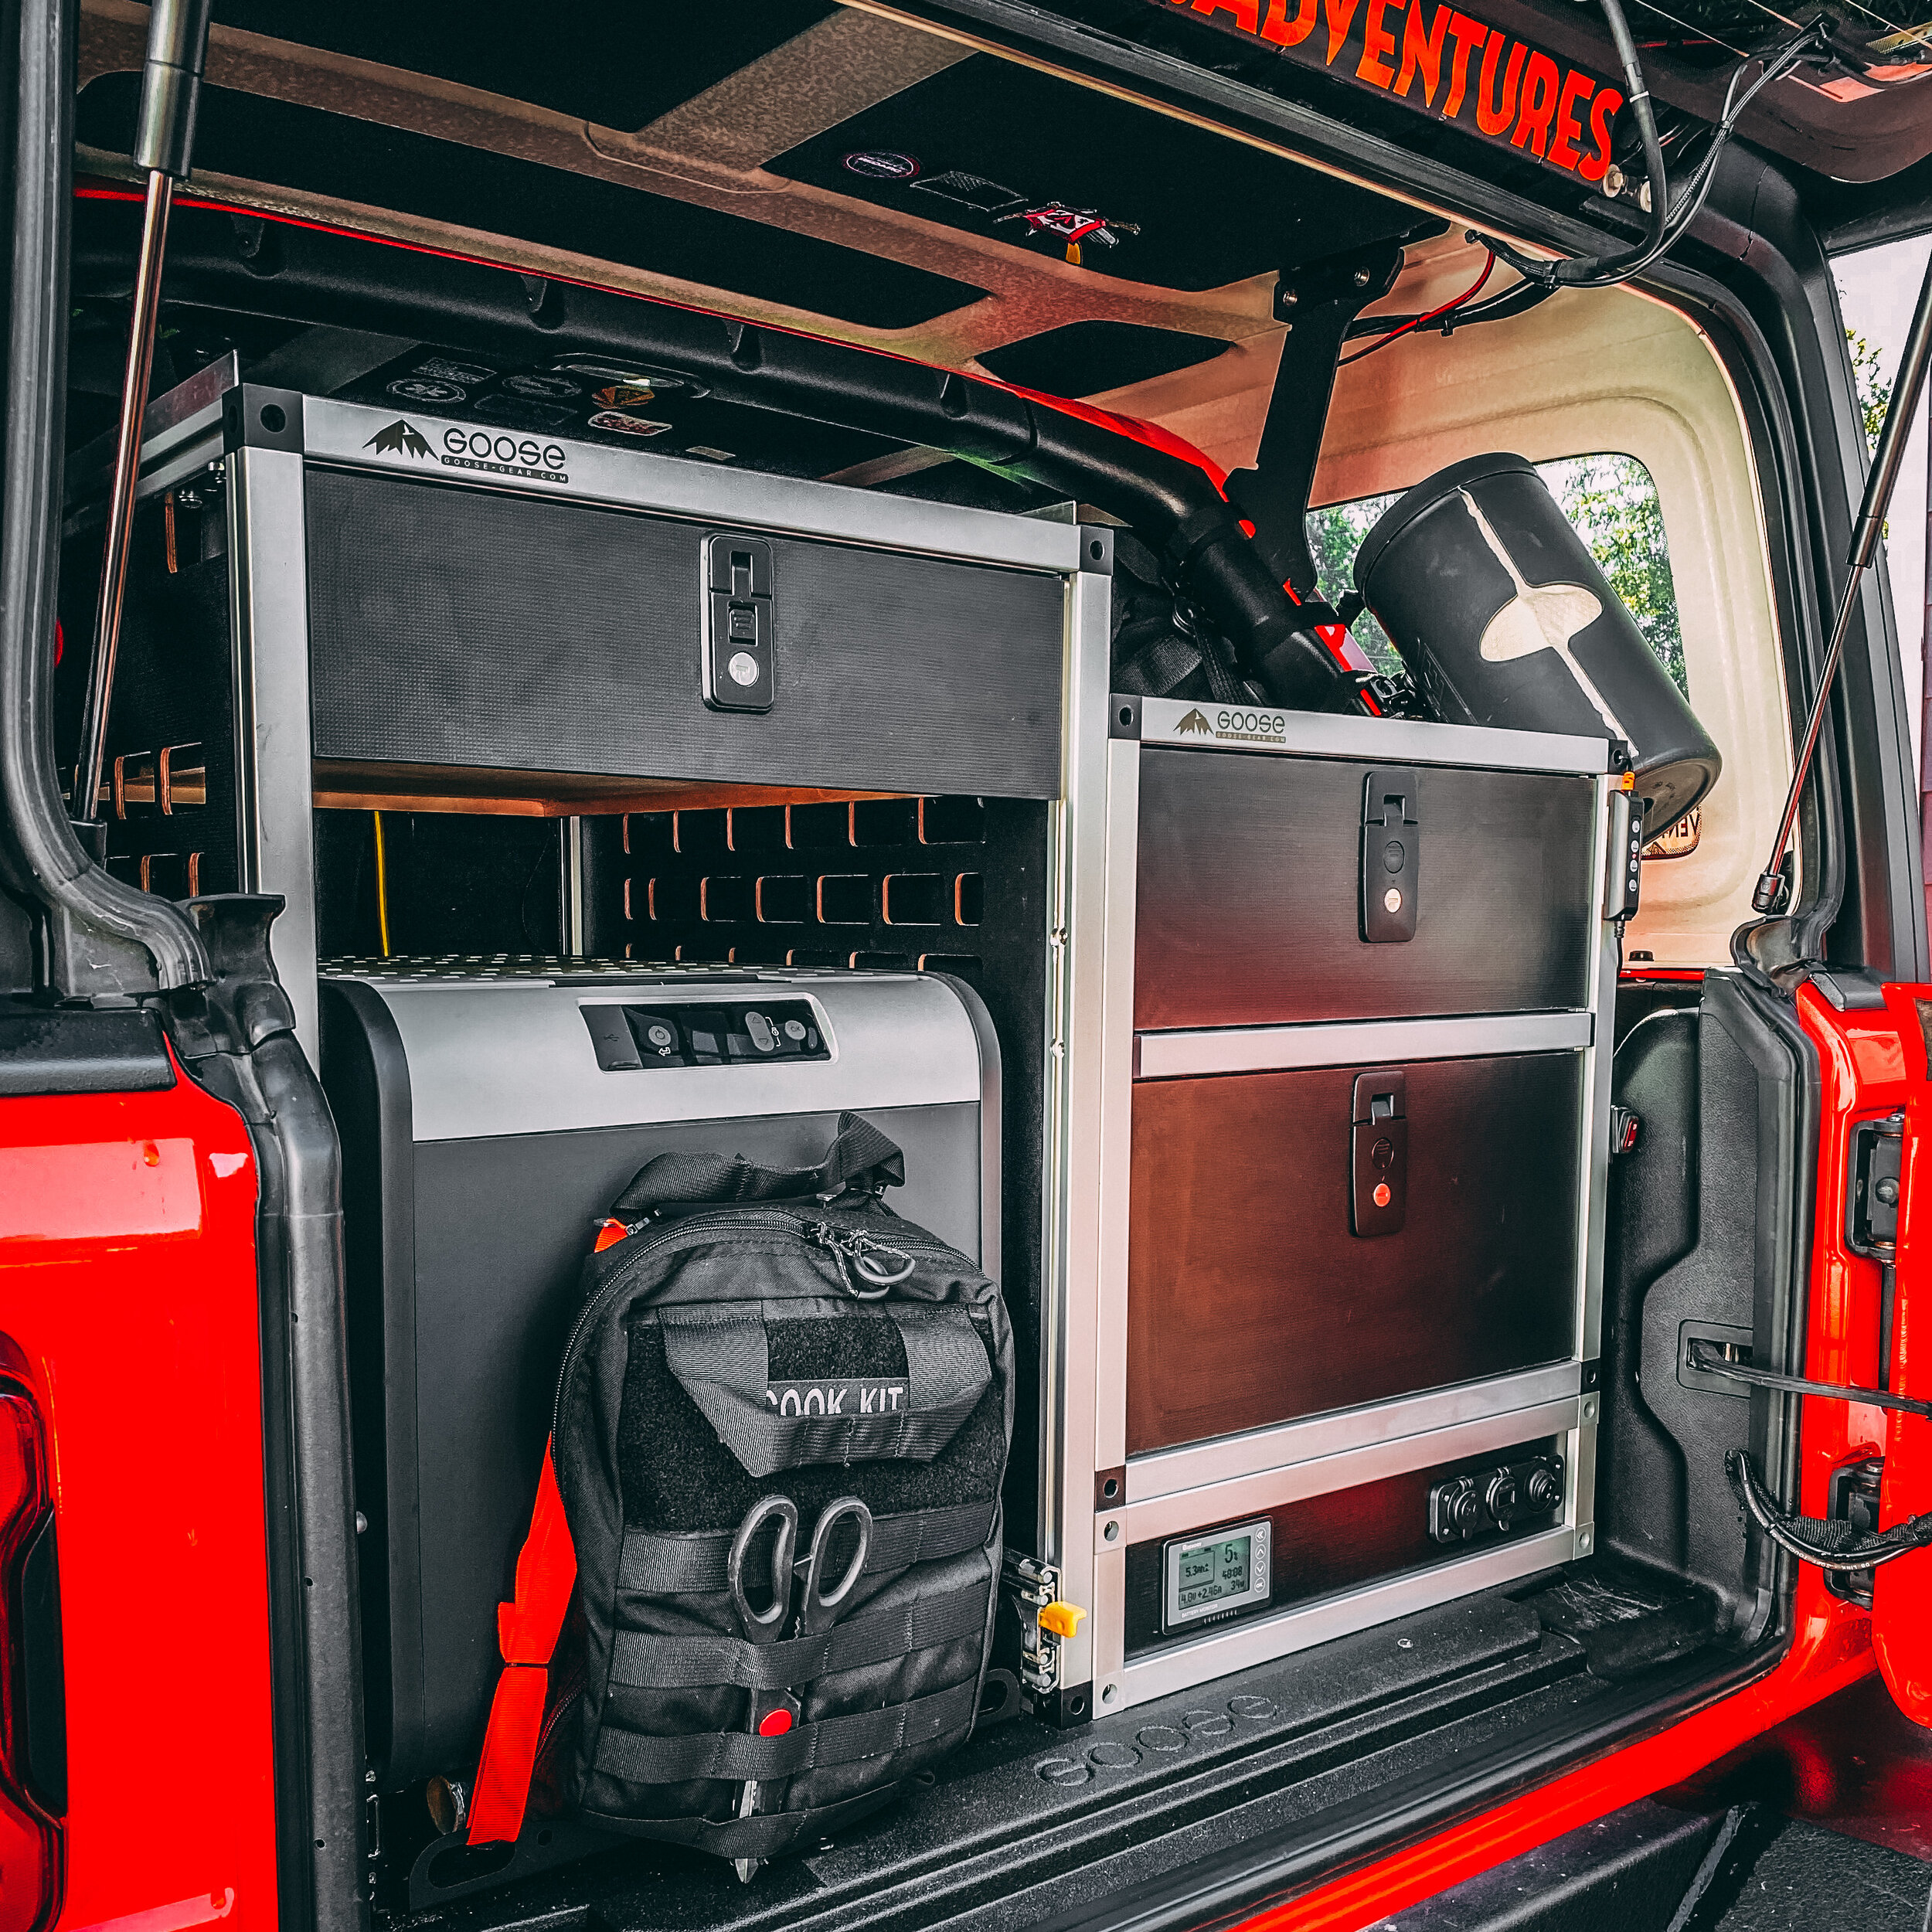
In the end, the conclusion was to build a DIY electrical box that was designed to integrate with the Goose Gear drawers - dubbed the InPowered Adventures Box — to house all the components in a clean and safe format.


InPowered Adventures
American-based overlanders have long favored the Goose Gear brand of storage drawers and camp kitchens. Without question, they make the best thing on the market, and I wanted to design a battery and electrical storage solution that integrated nicely with Goose Gear. One option would have been to mount the battery on top of my double drawer system, but I really didn’t like this option. I do not like the idea of that much weight (the 170ah battery from Kick Ass comes in around 100lbs) on top of the drawers, and it would take up a lot of valuable storage space on top of the drawers.
Many overland Jeep owners solve the problem of wear to stash their battery system by removing the back seats and replacing them with the Goose Gear plate system that runs into the back of the car. While we seriously considered this option, there are two big problems with it — first, I have to be willing to remove the back seats, which is something we wanted to avoid. Second, the Goose Gear stuff isn’t cheap, so paying to remove the back seats and then loosing the functionality of having back seats for those odd times we have passengers wasn’t an appealing prospect.
Borrowing an idea from another company that makes a competitor product, I decided to go the DIY route and build my own power box that would sit below the Goose Gear drawers. This would house the battery, charger, wiring, and various components out of the way, while still being accessible for maintenance or upgrades.
Here’s what the finished product looks like:

Now let’s work backwards on how we get there. For anyone with a Jeep JLU without subwoofer, you can follow these directions and specs to build the same thing.
The basic box frame is built out of 10 series (1”) extruded aluminum. There are a variety of companies selling this, including options to have pieces pre-cut and milled. I opted for tri-slot aluminum for all pieces to match the look of Goose Gear’s offerings. Here’s the components I used:
3” long tri-slot 10 series with 1/4-20 deep tap (x4)
23” long tri-slot 10 series with 1/40-20 deep tap (x4)
18 3/16” long tri-slot 10 series series with 1/4/20 deep tap slot (x4)
10 series 2 hole joining plate (x6)
Square Tri-corner with hardware (x8)
Optional:
4” long tri-slot 10 series with 1/4-20 deep tap (x3)
1/4-20 Drop-In T-Nut with spring ball (x6)
10 Series 2 Hole Inside Corner Gusset (x2)
Cable Tie mounting hardware (x6)
The optional pieces are 100% optional, but I used them to help create battery holders, a mounting spot for the DCDC charger, and wire routing.


The extruded aluminum is essentially adult legos, and with everything in hand, it was a matter of assembling it with a little trial-and-error. I say trial-and-error only because there was time spent finessing and obsessing over all the little details — do I want a cable tie here? What if I mounted the shunt there? We worked on our kitchen counter — my wife generously allowed this project to dominate our lives for a week — and dry fit everything there before moving it into the Jeep.
A few things about this design: First, it uses the aforementioned joining plates to attach to the Goose Gear drawer unit, essentially making it all one large module. This is good for security as I bounce down the trail, and offers a clean finish. Second, the L brackets that come with the Goose Gear drawers and mount those drawers to the plate system were moved to the InPowered Adventures box, so that hardware is totally re-purposed. Make sure you account for that in the setup and placement of T-nuts in the aluminum. Finally, you are working with electricity, so be sure to keep the install clean and tidy. A clean install is a safe install.


With our basic box built, we moved onto a little bit of the aesthetics. Although it’s not required for our install, we wanted to add an external battery monitor and a few extra power ports to the battery setup. We got the Renogy 500A battery monitor and a USB/cigarette power port thing from Amazon and built a custom face for the InPowered Adventures box that holds these accessories. To make the face plate, we used a 1/4” thick project board from the hardware store and painstakingly cut it to fit precisely. We actually made a template first and then improved on it for the final version, which was then primed and painted black to match the finish of the Goose Gear drawers. This front is the only side of the box that is fully enclosed; the rest is open for airflow. Also of note, the rear of the box will be accessible when the back seats are folded flat, and I should still be able to get into the box for future upgrades.


Wiring the Kick Ass DCDC Charger with MPPT into the Jeep JL
With our InPowered Adventures module built, it was time to work on installing it and wiring everything up. The main wiring runs to the Kick Ass DCDC Charger with MPPT Controller, which we reviewed in this post. I won’t re-hash everything we’ve said about it the product to date, because that review is rather extensive, so we will jump into the wiring assuming you are already familiar with the product. If you are not, I suggest pausing here, reading up on the Kick Ass controller, then coming back.
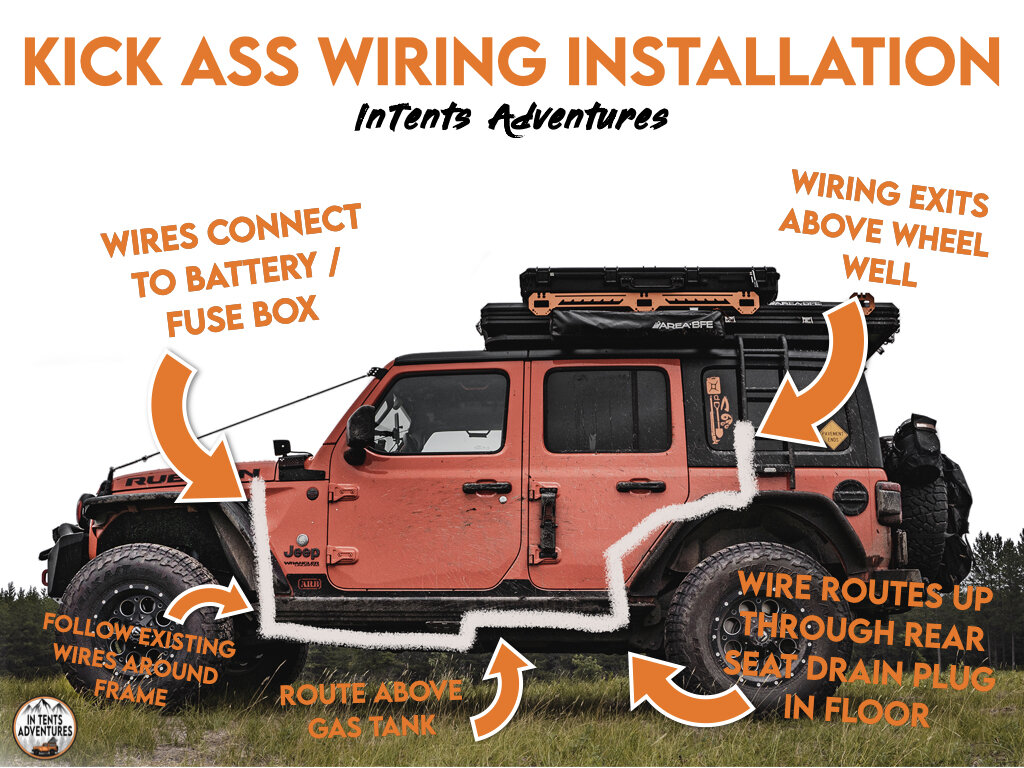
The most challenging part of the installation is running wiring from the fuse box and starter battery back into the trunk of the Jeep. The diagram below outlines how I ran the wires across down the engine bay, across the frame, over the fuel tank, up through the back seat passenger floor drain plug, across the carpet, and up and out through the rear passenger-side wheel well. It seems very complicated, but take your time and it’s a great and safe route to run the wires. I say safe, because if you are generous in your use of zip ties, it’s possible to route the wiring in a way that is pretty impervious to damage off-road.
You’ll want to run three wires from under the hood to the trunk of the car, and a fourth wire from the dash area to the trunk. The wires are as follows:
Positive wire from starter battery to DCDC controller
Negative wire from starter battery to DCDC controller
Ignition controller wire from fuse box to DCDC controller
External LED wire from dash area to DCDC controller (internal)
Ignition Control Wire
The ignition control wire is optional, but I highly recommend including it into your installation. It sends a signal to the Kick Ass DCDC controller when the vehicle’s ignition is engaged (compared to accessory mode), allowing the controller to start charging the auxiliary battery from the vehicle’s alternator after a 30 second delay.
Installation of this wire requires using a fuse tap into a fuse that is ignition controlled. In our case we routed to fuse 52, which controls the front dash cigarette lighter. The fuse tap is a micro 20amp connection.


External LED
The optional external LED wire is a nice way to get a visual indicator of the Kick Ass Products DCDC Charger’s current charging status. The LED will flash when the unit is charging the aux battery, which is a nice visual accompaniment to the charge controller, which is otherwise stashed in the trunk. We purchased an inexpensive LED light from Amazon and opted to mount our LED light on the passenger side grab handle. The positive end of this LED will need to be extended and connected to the LED wire on the controller. The negative end can connect to one of the three negative grounding posts in the passenger side wheel well.


Rooftop Tent Wiring (Optional)
One of the things we wanted to add to our rig was some permanent wiring that runs into our rooftop tent. In the past, we’ve carried battery bricks with us into the tent to power our fans, iPad, phones, and tent lighting. This was a cumbersome endeavor that also required remembering to re-charge those battery bricks between trips.
For this installation, we opted to use SAE connections, which are often found as a mechanism to add USB ports and other accessories to a motorcycle. For our specific installation, we ran a 20’ SAE cable from a switch up through the roof of our Jeep (drilling a hole in the fiberglass top and securing it with a waterproof connector), along the roof rack, and into the tent. Once inside the tent, the wire meets a Y splitter, where one end connects to the tent lights and the other connects to a USB connector. We purchased all of the components for this system on Amazon for a few bucks, so if you are interested in adding power to your rooftop tent, consider this route. One benefit of using the SAE connectors is that we can disconnect them when we don’t plan to use the tent for an extended period, ensuring no corrosion or damaging from being exposed to the elements.


Hopefully this gives you some inspiration for anyone else looking to build a similar setup for their Jeep JL. While this all seems complicated, it really was not, and I’m happy to answer any questions about the project. Leave me a comment below, or shoot us a note!